
Customer Svc: 855-620-2330 -
M-Sat -9am-6pm
Speak To Customer Service - 855-620-2330 - M-Sat 9:00am - 6:00pm MST
Customer Svc: 855-620-2330 -
M-Sat -9am-6pm
Speak To Customer Service - 855-620-2330 - M-Sat 9:00am - 6:00pm MST

Last Updated: August 25, 2026
A home golf simulator combines a launch monitor, impact screen, enclosure frame, hitting mat, projector, and simulation software to replicate playing golf on a real course. Getting every component right separates a setup that genuinely improves your game from an expensive novelty.
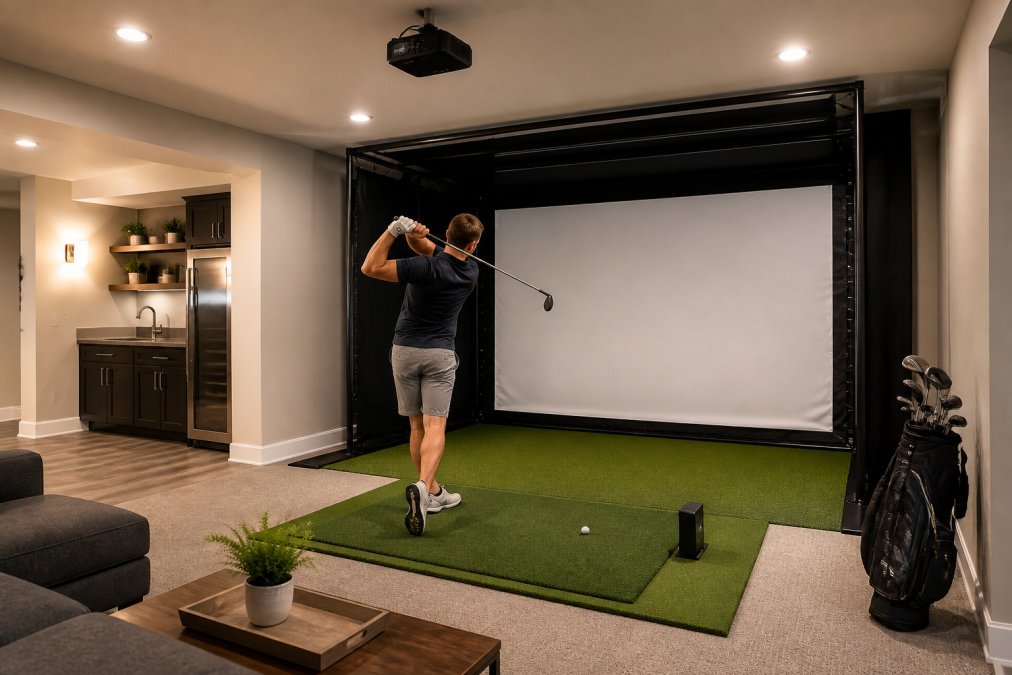
At Total Golf Simulators, we guide buyers through every component decision before equipment ships. The biggest mistake first-time builders make is buying components piecemeal without confirming they work together. A projector with the wrong throw distance, a launch monitor that doesn't sync with your software, or a ceiling that's two inches too low can derail an entire build.
Component |
Primary Function |
Key Spec to Check |
|---|---|---|
Launch monitor |
Captures ball flight data |
Camera-based vs. radar-based |
Impact screen |
Receives projected image and absorbs ball strikes |
Material durability, screen size |
Enclosure frame |
Structures the hitting bay and holds the screen |
Ceiling clearance, frame width |
Hitting mat |
Simulates turf for ball striking |
Thickness, material, stance width |
Short throw projector |
Projects simulation image onto screen |
Lumens, throw distance, aspect ratio |
Simulation software |
Renders courses, tracks swing analysis |
Compatibility with launch monitor |
Computer/graphics card |
Runs the software at playable frame rates |
GPU specs, latency |
Every component affects the others. Nail the list, and you have a system that delivers realistic ball flight data and genuine course simulation.
The minimum space for a functional golf simulator is roughly 10 feet wide, 10 feet deep, and 9 feet tall, though these are absolute floor numbers, not comfortable ones.
A 9-foot ceiling is workable for most golfers with a standard swing, but it's tight. Taller players or anyone with a steep backswing will clip the ceiling on full swings. A 10-foot ceiling gives genuine freedom of movement and accommodates virtually all swing types.
Measure your actual swing arc at its highest point, then add at least 12 inches of clearance above that. A finished basement with a dropped ceiling often measures lower than the structural ceiling above it. Strip the tiles, check the joists, and measure to the lowest obstruction.
A 10-foot-wide bay is the practical minimum for a right-handed golfer; left-handed players may need an extra foot. Twelve feet wide is the comfortable standard.
Depth determines your distance from the impact screen and your projector's throw distance. Most setups position the golfer 7 to 8 feet from the screen, requiring a total room depth of at least 15 to 18 feet to accommodate the projector. Shorter rooms require a short throw projector.
Square footage is the starting point. Two rooms with identical dimensions can produce very different results depending on wall treatment, electrical capacity, and sound transmission.
A golf ball striking an impact screen at full speed generates significant impact noise, and hard walls amplify that sound throughout the house. Targeted acoustic treatment makes a substantial difference:
The netting on either side of the enclosure frame also absorbs errant shots and reduces sharp impact sounds.
A full home golf simulator setup draws meaningful power. A projector, gaming-grade computer with dedicated graphics card, launch monitor, and lighting typically run on a 15-amp circuit, but a dedicated 20-amp circuit is the right call for permanent installation.
Key electrical considerations:
According to the National Electrical Code standards from NFPA, any new circuit installation in a residential space should be performed by a licensed electrician and inspected to local code.
The launch monitor is the brain of the entire system. It captures ball speed, spin rate, launch angle, and carry distance, then feeds that data to the simulation software to render accurate ball flight.
Radar-based monitors track the ball using Doppler radar and typically require more space behind the ball. They excel at measuring ball speed and carry distance but can struggle with short shots in confined spaces.
Camera-based monitors use high-speed cameras to capture the club face and ball at impact, measuring spin rate, launch angle, and clubface data with high precision. They generally require less room depth and perform well in tighter spaces, making them common for basement builds.
The right choice depends on your simulation software. Not every launch monitor is compatible with every software platform, and compatibility directly affects latency, the delay between your swing and the ball appearing on screen. High latency breaks immersion.
According to the R&A and USGA's equipment standards documentation, accurate ball flight data is central to meaningful practice feedback.
The enclosure frame, impact screen, and hitting mat form the physical core of the simulator bay.
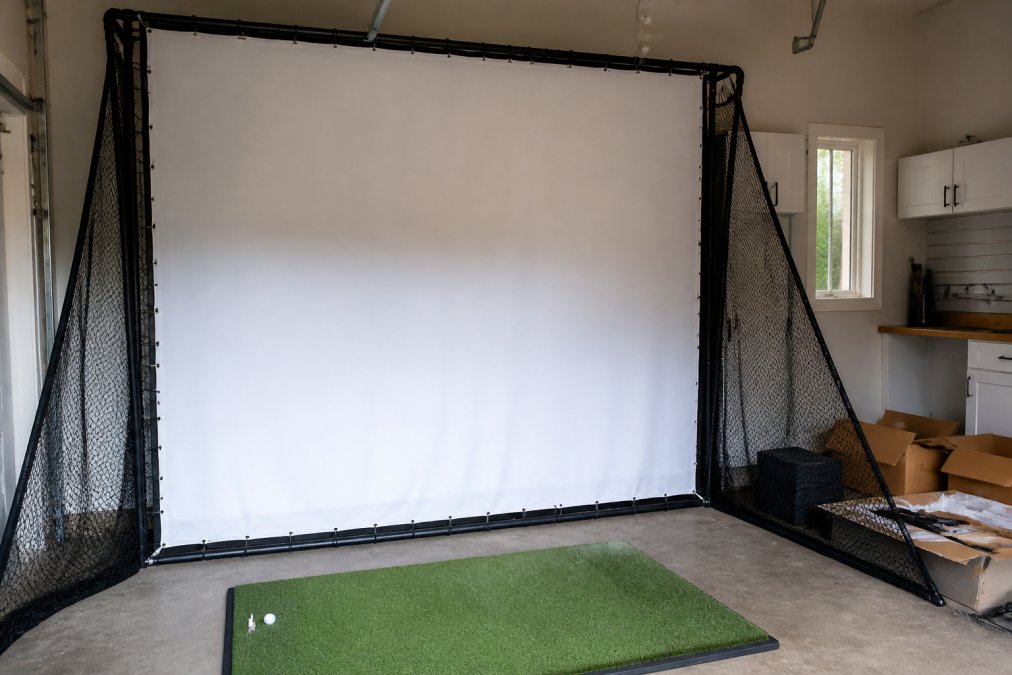
Enclosure frames are typically constructed from slotted angle iron or aluminum extrusion. Steel frames are heavier and more permanent; aluminum frames are lighter and easier to reconfigure. The frame must be sized to your screen dimensions and anchored securely.
Impact screens attach to the frame using bungee cords threaded through grommets. This system allows the screen to absorb ball strikes by giving slightly on impact, extending screen life and reducing noise. A screen stretched too tightly will wear out faster; one that's too loose will ripple and distort the projected image.
Hitting mats need at least an inch of cushioning beneath the turf surface, realistic fairway texture, and enough width for a full stance. Many serious setups use a mat with a separate tee line insert for adjustable tee height.
The projector and computer are where many builds either succeed or stall.
Projector selection starts with throw distance, the ratio between the projector's distance from the screen and the width of the image it produces. A short throw projector can produce a full-sized image from a much shorter distance, making it the standard choice for most home builds. For very shallow rooms, an ultra-short throw projector mounts close to the screen.
Brightness matters too. A projector rated at 3,000 lumens or higher will produce a clear image even in a room that isn't completely dark. Aspect ratio should match your screen dimensions, typically 16:9. Minimize keystone correction; physical projector placement is almost always preferable.
Computer hardware must match your simulation software's demands. A dedicated graphics card, not integrated graphics, is required for smooth frame rates. Latency, the time between your swing and the ball appearing on screen, should be under 50 milliseconds. A slow GPU or insufficient RAM will push latency higher and make the simulation feel disconnected from your actual swing.
As documented in technical guidance from the Golf Simulator Forum community, frame rate and latency are consistently cited as the top factors affecting simulator realism.
Most guides stop at installation. Here's what keeps a home golf simulator running well for years.
Impact screen maintenance is the highest-priority ongoing task. Inspect the screen surface monthly for small tears, especially around grommet attachment points. Minor tears can be repaired with screen repair tape; a screen with multiple tears should be replaced. Most quality screens are rated for tens of thousands of ball strikes with correct tension and proper frame alignment.
Hitting mat replacement is inevitable. Even the best mats compress over time, particularly in the tee line area. Rotate the mat 180 degrees periodically to distribute wear. When the turf surface shows significant flattening or the cushioning feels hard, it's time to replace it.
Software and firmware updates improve data accuracy and fix compatibility issues. Check for updates quarterly.
Smart home integration is a genuine quality-of-life upgrade. A smart lighting scene that dims to simulator mode, a smart thermostat that pre-conditions the room, and a smart plug that powers up equipment on a schedule all reduce friction and make the space more inviting.
A complete build follows a logical sequence. Skipping steps or working out of order is the most common reason builds stall.
Step 1: Measure and confirm your space. Measure ceiling height to the lowest obstruction, room width at the hitting position, and total room depth. Confirm electrical panel capacity.
Step 2: Choose your launch monitor. Select based on room depth, software compatibility, and the type of data you need.
Step 3: Select your simulation software. Confirm compatibility with your chosen launch monitor before purchasing anything else.
Step 4: Size your enclosure frame and impact screen. Frame width and height should match your ceiling clearance and room width.
Step 5: Calculate projector throw distance. Use your room depth and screen width to calculate the required throw ratio.
Step 6: Spec your computer hardware. Match GPU performance to your software's recommended specs. Prioritize low latency.
Step 7: Plan cable management and electrical. Run dedicated circuit wiring and install conduit for cables.
Step 8: Assemble the enclosure frame. Follow the manufacturer's assembly sequence and anchor securely.
Step 9: Mount the impact screen. Attach bungee cords at moderate tension through all grommet points.
Step 10: Install the hitting mat. Position with the tee line centered on the screen. Place rubber underlayment beneath it.
Step 11: Mount and calibrate the projector. Mount at the calculated throw distance and minimize keystone correction.
Step 12: Configure the launch monitor and software. Follow the manufacturer's calibration procedure and run test shots.
Step |
Focus Area |
Common Mistake |
|---|---|---|
1 |
Space measurement |
Measuring to ceiling tile, not structural ceiling |
2-3 |
Launch monitor and software |
Buying incompatible combinations |
4-5 |
Screen and projector sizing |
Miscalculating throw distance for room depth |
6 |
Computer hardware |
Using integrated graphics instead of a dedicated GPU |
7 |
Electrical and cables |
Sharing a circuit with other high-draw appliances |
8-10 |
Physical assembly |
Over-tensioning the impact screen |
11-12 |
Calibration |
Skipping manufacturer calibration steps |
Building a home golf simulator is entirely manageable when components are matched correctly from the start. Total Golf Simulators offers a Simulator Finder Quiz that matches your specific space dimensions and budget to a compatible equipment package. For anyone who wants expert guidance before committing to a full build, that's where to start.
The hardest part of building a home golf simulator isn't the assembly; it's making sure every component works together before anything ships. Total Golf Simulators provides expert guidance and complete turnkey solutions designed to eliminate compatibility risk. With a curated selection of industry-leading launch monitors, enclosures, hitting mats, and projectors, plus a Price Match Guarantee and free shipping on most items, you get a system built for your specific space. Shop Golf Simulators at Total Golf Simulators and get your build right the first time.
Total cost depends heavily on the components you choose. A budget-focused DIY build using an entry-level launch monitor, a basic enclosure frame, and a short throw projector will cost far less than a premium turnkey setup with a high-accuracy radar launch monitor and commercial-grade screen. Because component pricing varies widely, visit Total Golf Simulators for current pricing on complete packages and individual components matched to your space and budget.
A 9-foot ceiling is workable for many golfers, particularly those with a compact swing or those using shorter irons and wedges. However, taller players or those with an upright swing plane may clip the ceiling on full driver swings. A ceiling of at least 10 feet is the more comfortable standard. If your space is exactly 9 feet, position the hitting mat slightly forward of center and test your swing arc before committing to a permanent enclosure installation.
Every functional home golf simulator needs six core components: a launch monitor to capture ball flight data including ball speed, spin rate, and launch angle; an impact screen rated to absorb repeated ball strikes; an enclosure frame with side netting; a short throw projector with adequate lumens and frame rate; a hitting mat with realistic turf; and a computer with a graphics card capable of running simulation software. Simulation software ties all the hardware together and determines the quality of your on-screen course experience.
The practical minimum for a home golf simulator is roughly 10 feet wide, 10 feet tall, and 15 feet deep. Width accommodates the swing arc without hitting side walls, depth gives you enough distance between the ball and the screen for safe impact, and ceiling height allows a full swing. Tighter spaces can work with careful component selection, but going below these dimensions typically requires compromises in swing freedom or screen size.
Yes. Retractable enclosure frames and ceiling-mounted projector brackets let you fold or stow the setup when not in use. Some golfers use freestanding enclosures that can be partially disassembled in under 30 minutes. Choosing a hitting mat that sits flat on the floor without permanent anchoring also helps. The key is planning cable management from the start so power and data cables don't become a tripping hazard when the simulator is packed away.
Accuracy depends on the launch monitor technology. Radar-based units are generally more consistent on ball speed and carry distance, while camera-based systems excel at capturing spin rate and club path data in confined spaces. Premium launch monitors used in professional fitting bays use the same core sensor technology available for home builds. For instruction use, look for a unit that reports ball speed, spin rate, launch angle, and carry distance at minimum, as these four metrics drive meaningful swing analysis.
This article was written using GrandRanker