
Customer Svc: 855-620-2330 -
M-Sat -9am-6pm
Speak To Customer Service - 855-620-2330 - M-Sat 9:00am - 6:00pm MST
Customer Svc: 855-620-2330 -
M-Sat -9am-6pm
Speak To Customer Service - 855-620-2330 - M-Sat 9:00am - 6:00pm MST

Last Updated: September 10, 2026
A retractable golf screen for spare room conversions solves the single biggest constraint of indoor golf: you do not have a dedicated bay. A retractable golf screen is a ceiling-mounted projection surface that rolls up into a compact housing when you are not practicing, freeing the floor for a guest bed, a home office, or a living area. At Total Golf Simulators, we build these setups for homeowners who want year-round practice without surrendering an entire room.

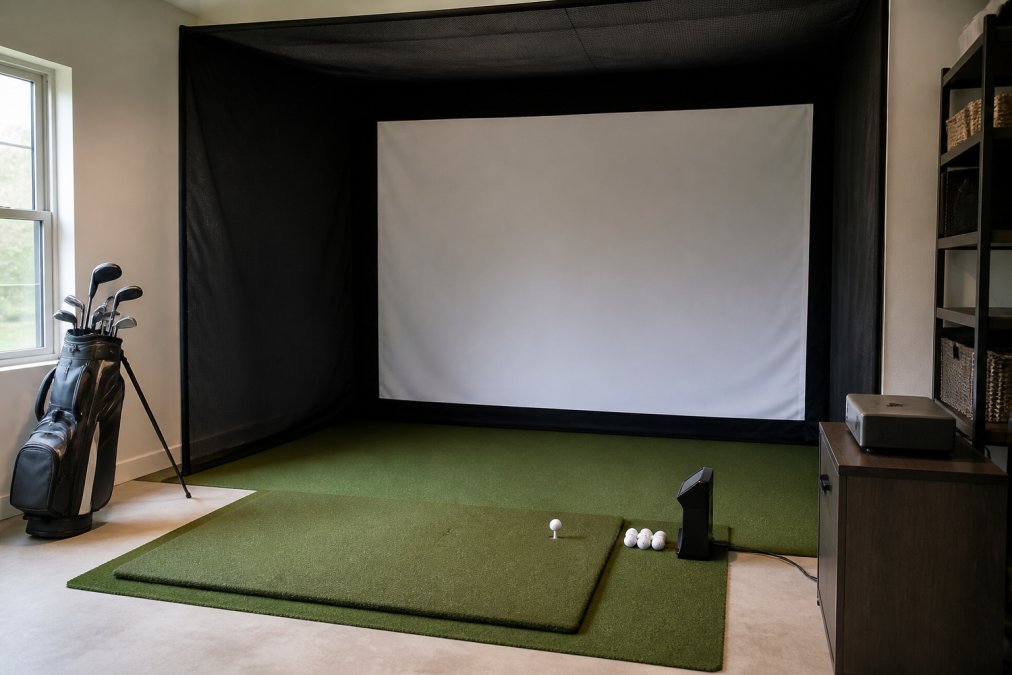
The math is straightforward. A fixed enclosure eats 10 to 12 feet of depth permanently. A retractable system gives that space back in under a minute, which matters when the room also serves as a bedroom or office. The trade-off is that retractable systems demand more planning up front: ceiling structure, retraction mechanism, and screen tension all have to be right, or the screen will wrinkle and the whole illusion collapses.
Below, we break down exactly how to measure, choose, and install a retractable golf screen so the room works for golf and for everything else.
Start with three numbers: ceiling height, room depth, and width. Ceiling height determines whether you can swing a driver at all. Room depth sets your projector throw distance and how far the ball travels before impact. Width tells you what enclosure size fits without crowding the walls.
For a comfortable driver swing, most indoor setups need at least 9 to 10 feet of ceiling height, though taller players should measure their actual swing arc rather than guess (golfdigest.com). Depth of 12 feet or more lets a launch monitor read ball flight before the ball reaches the screen. Width should leave at least 1 to 2 feet of buffer on each side of the enclosure for safety netting and side barriers.
A ceiling-mounted screen adds load to your ceiling, and not every ceiling is built to carry it. Motorized housings typically weigh more than manual units, and the load is concentrated at the mounting points rather than spread across the surface.
Before you mount anything, identify whether you are attaching to joists, a concrete slab, or a drop ceiling. Joists are the ideal anchor point because they carry structural load. Drop ceilings are not, and a screen hung from ceiling tile will eventually sag or pull free. If you cannot find a joist where you need one, a mounting board spanning two joists distributes the weight safely.
For heavier motorized units, have a contractor confirm the joists can handle the static load plus the dynamic pull of the retraction mechanism. This is the step most homeowners skip, and it is the one that causes the most expensive failures.
Small spare rooms amplify sound. A golf ball hitting an impact screen produces a sharp crack that bounces off hard walls, and in a room under 150 square feet, that sound reflects fast enough to feel punishing (acousticalsociety.org).
Acoustic treatment for a small simulator room is less about soundproofing the whole space and more about absorbing the impact noise at the source. Heavy curtains on the walls, a thick hitting mat, and acoustic panels behind the screen all reduce reflected sound. Carpet or rubber flooring helps more than most people expect because it kills the floor reflection that makes the room feel loud.
If the room shares a wall with a bedroom or office, treat that wall first. A layer of mass-loaded vinyl behind the drywall or a dense acoustic panel wall does more for the neighbor than anything you do on the screen side.
Motorized retraction wins for anyone who uses the room daily and wants the screen to disappear without effort. Manual retraction costs less and has fewer failure points, but you will roll it up by hand every session.
Motorized roller systems use a remote or wall switch to lower and raise the screen. They are the better choice when the screen mounts high, when the room is used for other purposes several times a week, or when you want the screen to stop at a precise height every time. The U.S. Consumer Product Safety Commission guidance on motorized window coverings offers useful context on safe motorized screen operation and child safety around automated rollers, which applies to any motorized screen in a home.
Manual retraction uses a pull cord or crank. It is reliable, inexpensive to repair, and has no motor to burn out. The downside is convenience: if the screen is mounted at 9 feet, you need a reach pole or a step stool every time.
A middle path exists. Some systems use a spring-assisted manual roll that reduces the effort, and some motorized units include a manual override for power outages.
Feature |
Motorized Roller |
Manual Retraction |
|---|---|---|
Effort per use |
None, remote or switch |
Pull cord or crank |
Cost |
Higher |
Lower |
Failure points |
Motor, wiring, remote |
Cord, spring |
Best for |
Daily use, high mounts |
Occasional use, tight budgets |
Power required |
Yes |
No |
Impact screen material determines how the ball behaves, how the image looks, and how long the screen lasts. A durable 3-ply fabric screen absorbs ball speed without stretching, holds a crisp image, and survives thousands of hits.
Cheap screens fail in three ways: they wrinkle and never hang flat, they develop permanent dimples where the ball hits most, and they tear at the seams. A 3-ply construction with a tight weave resists all three because the layers distribute impact force across the surface rather than concentrating it at one point.
Long-term fabric wear is the factor most buyers underestimate. Even a good screen shows wear after heavy use, and the areas that take the most abuse are the center and the lower third where low shots land. Rotating the screen, if your mounting allows it, spreads the wear. Screens with a replaceable surface outlast those where the whole unit must be replaced when the fabric gives out. sports room design ideas.
Aspect ratio decides how much of your wall the image fills. A 4:3 aspect ratio is taller and narrower, which suits rooms with limited width and higher ceilings. A 16:9 aspect ratio is wider and shorter, which matches most modern simulator software and widescreen projectors.
For a spare room, 4:3 often fits better because the room is usually deeper than it is wide. A 16:9 image needs more horizontal space, and in a narrow room the image either shrinks or the projector has to sit closer, which increases throw distance demands. Match the aspect ratio to the room first, then pick a projector that supports it natively.
The best launch monitors for 2026 fall into three tiers: radar units that track ball flight, camera-based units that measure club and ball at impact, and hybrid systems that combine both. Your choice depends on how much space you have and how much data you want.
Radar-based monitors need depth to track the ball, so they suit rooms with 12 feet or more from mat to screen. Camera-based monitors work in tighter spaces because they read the ball at impact rather than tracking it downrange. Hybrid units give you the accuracy of camera tracking with radar's ball-flight data, at a higher price.
Pairing matters as much as the monitor itself. A monitor that outputs 4:3 native resolution works best with a 4:3 screen. A monitor with limited ball-flight tracking works best with a screen positioned close enough to catch the ball before the monitor loses it. This is where buying components separately gets risky, and it is exactly the problem a curated setup solves.
Golf simulator projector throw distance is the distance from the projector lens to the screen, and it determines where you can mount the projector and how large the image will be. Throw distance is a ratio: a short-throw projector needs less distance for the same image size, while a standard projector needs more.
Calculate throw distance before you buy. Measure from your intended projector mount to the screen surface, then match that number to a projector whose throw ratio produces the image size your screen supports. Getting this wrong is expensive: too short and the image overflows the screen, too long and it does not fill it.
Lighting and ambient interference matter just as much. A projector image washes out in a bright room, so control the light sources. Blackout curtains on windows, dimmable overhead lights, and avoiding direct light on the screen all preserve image contrast. In a spare room with a window, blackout treatment is not optional if you want a usable image during the day.
A DIY golf simulator enclosure costs less up front and gives you full control over components. A turnkey retractable setup costs more but arrives as a matched system with the screen, mechanism, and mounting hardware designed to work together.

The DIY path makes sense if you enjoy sourcing parts, have construction experience, and can verify that every component is compatible. The risk is the compatibility problem: a projector that does not match the screen, a monitor that does not sync with the software, or mounting hardware that does not fit your ceiling.
The turnkey path removes that risk. You get a system where the screen, retraction mechanism, and enclosure are engineered as one unit. For a spare room where the setup has to work the first time, that certainty is worth the premium.
Installation cost depends on whether you mount to joists or need structural reinforcement, whether you run power for a motorized unit, and whether you hire out the work. A straightforward joist mount with a manual screen is a weekend project. A motorized unit on a finished ceiling with power to run can require an electrician and a contractor.
Total Golf Simulators carries retractable enclosure options across a range of budgets, including the Vanish Series® Retractable Golf Enclosure at $2,999.00, the Remote Control Motorized Drop Down Golf Sim Enclosure at $2,650.00, and the Impact Sports Space Saving Collapsible Enclosure at $1,999.00, with custom sizes available. For a tighter budget, the DIY Golf Enclosure System starts at $1,349.00 and accepts multiple upgrade options.

Common mistakes to avoid:
Most spare-room builds need at least 9 feet of ceiling height for full swing clearance, 10 feet of width, and 12 to 14 feet of depth for the ball to travel before impact. A retractable golf screen itself adds only 12 to 18 inches of depth when extended. Measure your room dimensions and swing clearance before ordering, since a 10-foot ceiling can work for shorter players but limits driver swings.
Yes, when the projection surface uses a durable 3-ply fabric rated for ball speed. A quality impact screen absorbs repeated driver strikes without tearing, and the enclosure's side barriers and safety netting contain mishits. Long-term fabric wear depends on ball speed, hitting frequency, and whether you alternate hitting zones across the screen instead of pounding the same spot.
A retractable golf screen is built for exactly this scenario. Because it rolls up into a ceiling-mounted housing, the room returns to a guest bedroom, office, or living space in seconds. The main constraints are ceiling height, ceiling structural requirements for the mounting hardware, and projector throw distance. A short-throw projector solves tight depth in most small rooms.
A fixed enclosure permanently claims the room. A retractable golf screen folds away, so a spare room stays multi-purpose. You also get cleaner cable management, easier home theater integration, and less visual clutter. The trade-off is that a retraction mechanism adds cost, and motorized roller systems cost more than manual retraction but are easier to operate daily.