
Customer Svc: 855-620-2330 -
M-Sat -9am-6pm
Speak To Customer Service - 855-620-2330 - M-Sat 9:00am - 6:00pm MST
Customer Svc: 855-620-2330 -
M-Sat -9am-6pm
Speak To Customer Service - 855-620-2330 - M-Sat 9:00am - 6:00pm MST

Last Updated: September 11, 2026
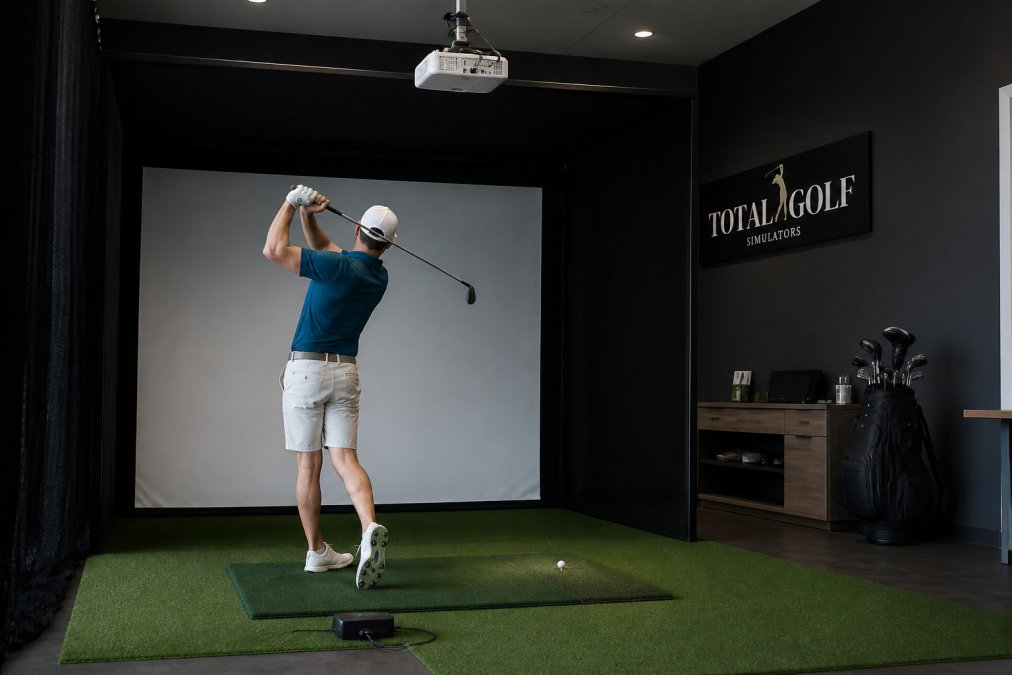
Turnkey golf simulator alternatives are complete indoor golf packages that bundle enclosure, launch monitor, hitting mat, projector, and software into one coordinated purchase. At Total Golf Simulators, buyers arrive with the same frustration: they want a working bay, not a research project. A turnkey golf simulator typically covers five core elements: the enclosure and impact screen, the hitting mat, the launch monitor, the projector, and the simulation software. The catch is that "turnkey" means different things to different sellers. Some ship a box of parts and a PDF; others handle sizing, hardware integration, and system calibration. Knowing which you're buying is the difference between a weekend build and a months-long headache.
Custom golf simulator installation adapts the enclosure dimensions, projector throw distance, and launch monitor placement to your specific room instead of forcing your room to fit a fixed kit. That distinction matters most in basements and garages, where ceiling height requirements and available depth rarely match a catalog size. A custom build accounts for three variables a standard kit ignores: your exact ceiling height, your swing clearance, and where the projector can actually mount. The trade-off is cost and lead time. Custom sizing adds engineering and fabrication steps, and returns on modified enclosures are typically restricted. For a spare room with odd dimensions, custom is often the only path to a realistic ball flight window. For a clean 10-foot ceiling and 15 feet of depth, a standard package usually does the job at a lower price.
DIY versus professional golf simulator installation comes down to three factors: your available time, your tolerance for troubleshooting, and how precisely your space matches a stock kit. Most DIY enclosure kits assemble in a few hours with basic tools. The hard part isn't the frame, it's the alignment.

Before you decide, inventory the skills the job demands. A typical DIY enclosure build calls for:
If you can mount a shelf level and read a manual, you can assemble most DIY enclosures. The savings are real, and the process teaches you how the system fits together, useful later when you adjust screen tension or replace a component.
Most DIY failures aren't structural. They're alignment and integration problems that surface after the frame is up:
Professional installation pays off when the room is tight, the ceiling is low, or the build is commercial. In a commercial setup, downtime costs money, and a misaligned launch monitor produces swing analysis data your students won't trust. Professional assembly also handles the electrical and mounting work that trips up first-time builders.
A professional crew typically brings three things a DIY build lacks: a laser level for projector and screen alignment, a calibrated launch monitor setup that matches the manufacturer's tracking spec, and a single point of accountability if a component doesn't integrate. That last one matters most, when components come from different vendors, a DIY builder owns every compatibility problem personally.
A growing share of buyers split the work. They assemble the enclosure themselves, the least technical, most forgiving part of the job, and hire a pro for projector alignment, launch monitor calibration, and electrical. This hybrid approach captures most of the labor savings while eliminating the two failure modes that cause the most post-install frustration. If your room is close to a stock kit size but your electrical panel is far from the bay, this is often the highest-value split.
| Situation | Recommended Path |
|---|---|
| Room matches a stock kit, standard ceiling, you're handy | Full DIY |
| Room matches a stock kit, but electrical is complex | Hybrid, DIY frame, pro electrical and calibration |
| Odd dimensions, low ceiling, or steep swing plane | Professional |
| Commercial use with paying clients | Professional |
| Multi-vendor component mix | Professional or hybrid |
The honest answer is that DIY is a skills-and-time decision, not a money decision alone. The kit price is the same either way. What changes is who owns the alignment, the electrical, and the troubleshooting, and that ownership is what you're actually buying when you pay for professional installation.
Professional golf simulator setup cost splits into hardware and labor, and labor is the smaller line item in most builds. The enclosure is usually the largest single hardware expense, followed by the launch monitor and projector. Assembly labor, when added, runs as a flat fee on top of the enclosure price. Where budgets blow past estimates is in the room itself: electrical work, lighting control, and acoustic treatment are frequently overlooked. Below is how the five enclosure packages we carry compare on price and positioning.
| Enclosure Package | Price | Best For |
|---|---|---|
| Golf Bays EasySim DIY | $999 | Tight budgets, compact rooms |
| Impact Sports DIY | $1,342 | Best overall DIY value |
| All Sport Systems DIY | $1,349 | Upgrade flexibility |
| Carl's Place Pro | $3,409.95 | Premium visuals, heavy use |
| Modular Panel Wall Bay | $6,850 | Luxury and commercial studios |
The gap between the $999 entry point and the $6,850 modular system is not just materials. It's installation speed, acoustic performance, and how the finished room looks when the lights are on.

Every package below ships with the enclosure structure and an impact screen. What separates them is how much of the rest of the build they simplify. Here's the honest breakdown, including where each one falls short.
The EasySim is the most affordable complete enclosure we carry, built for the DIY golfer working in a garage or spare room. It ships with aluminum clicker tubing, black surround fabric, and a Lite impact screen in a 4:3 aspect ratio. The compact 1-meter depth is the standout feature for tight spaces, letting you swing comfortably in rooms with limited length. Where it falls short: the Lite screen isn't designed for the heaviest commercial ball volume, and the 4:3 ratio narrows your projector choices compared to a 16:9 setup.
Impact Sports includes the complete pole system and interior pole padding at no extra cost, which is why we consider it the best overall DIY value. The padding eliminates ball bounce-back, a safety issue cheaper kits leave you to solve yourself, and the bungee-tensioned netting keeps the screen taut and lets you retighten as the fabric relaxes. Five sizes are available, and the Deluxe screen option adds a back blackout layer to reduce light distortion and sharpen image clarity. The one drawback: the largest sizes are limited to the basic screen, so if you need a very wide bay with the Deluxe upgrade, check sizing first.
All Sport Systems wins on configurability. The base kit includes the impact screen, a one-piece RipStop black wrapper, four replaceable trim sleeves, ball bungees, and heavy-duty corner connectors for 1-inch EMT poles. Poles aren't included by default, which keeps shipping down, and you can source 1-inch EMT conduit locally. The upgrade list is unusually deep: fabric upgrades, foam wedge inserts, a baffle net, angled side netting, SkyGuard top and side netting, a sliding projector mount, and a projector protective cage. If you plan to build in stages, this is the enclosure that grows with you.
The Pro Enclosure is engineered for dedicated rooms and commercial facilities. The BlackStop fabric darkens the enclosure interior, which improves projector brightness, color depth, and contrast. The moveable crossbar adjusts forward or backward during setup, so you can dial in launch monitor alignment for either radar or camera-based tracking without committing at checkout. A one-piece wraparound ceiling and sidewall cuts installation time significantly, and the frame supports heights up to 135 inches. It's fully customizable down to the inch across six standard sizes and four depth options. The drawback is cost. Replacement parts are available individually.
The Modular Bay Enclosure uses high-density padded wall panels instead of netting, reducing bounce-back and noise while giving the room a finished, architectural look. It's the right choice for a home studio, entertainment room, or commercial facility where clients see the space. Custom sizes are quoted on request. The honest limitation: at this price you're paying for aesthetics and acoustic performance as much as function, and it's overkill for a garage bay used by one person.

Choosing the right setup starts with measuring your room before you look at a single product. Write down ceiling height, width, and depth, then subtract for swing clearance and screen distance. A 10-foot ceiling works for most golfers, but tall players with a steep swing plane need more headroom than the spec sheet suggests. Next, decide whether you're building for personal practice or commercial use, since ball volume and uptime requirements change the enclosure tier you should be shopping. Then match your launch monitor to the enclosure, confirming the tracking technology works with your chosen depth and crossbar position. Finally, budget for the room, not just the kit. Electrical, lighting, and sound control are part of the project whether or not they're on the invoice.
Most buying guides stop at ceiling height and depth. The three factors that actually determine whether a high-end build performs as intended are electrical capacity, climate control, and acoustics, none of which appear on a typical enclosure spec sheet.
Electrical load. A full simulator bay draws more than most homeowners expect. A projector, a gaming PC or console, a launch monitor, an overhead light, and a screen or monitor can easily exceed a single 15-amp household circuit (osha.gov). Before you buy, locate the panel and confirm whether the bay's outlet is on a dedicated circuit. If it isn't, an electrician may need to run a new line, a cost that's easy to miss when comparing enclosure prices. For commercial bays running multiple stations, a subpanel is often the cleaner solution.
Climate control. Projectors and electronics generate heat, and enclosures trap it. A garage bay in a hot climate can push projector operating temperatures past the manufacturer's recommended range, shortening lamp and electronics life (energy.gov). The fix is usually simple, a dedicated mini-split, a portable AC unit, or improved airflow through the enclosure, but it has to be planned before the enclosure goes up, not after.
Acoustics. This is the single most under-discussed issue in residential simulator builds. A golf ball hitting an impact screen at speed produces a sharp, percussive report that travels through walls and floors (the CDC). Neighbors in an attached home, a sleeping child upstairs, or a spouse working in the next room will all hear it. Effective mitigation combines three layers: a padded enclosure or acoustic panels behind the screen, mass-loaded vinyl or acoustic drywall on shared walls, and a solid-core door with weatherstripping on the bay entrance. Buyers who skip this step often end up limiting their practice hours to avoid complaints, which defeats the purpose of an indoor bay.
Before you order anything, confirm each of these:
Once the room is measured and the technical requirements are understood, component selection gets easier. The launch monitor's tracking technology dictates minimum depth. The projector's throw ratio dictates mounting distance and screen size. The enclosure's dimensions dictate where the hitting mat sits. When those three are chosen independently and then forced to fit, the result is a bay that works but never feels right, a screen that's slightly too small, a projector mounted too close, a mat positioned where the swing feels cramped.
The practical approach is to pick the enclosure first, since it's the hardest component to modify, then select the projector and launch monitor that fit its dimensions. That order also makes electrical and acoustic planning concrete, because you know the final footprint before you call an electrician.
If you'd rather not assemble the puzzle yourself, Total Golf Simulators offers a curated selection of launch monitors, enclosures, hitting mats, and projectors, plus a Simulator Finder Quiz that matches setups to your space and budget. You can also browse our full range of golf simulators to compare options side by side.
A turnkey golf simulator installation bundles the enclosure, impact screen, launch monitor, projector, and hitting mat into one coordinated package. You avoid mismatched components, get expert guidance on sizing and compatibility, and typically receive support for setup and troubleshooting. For buyers who want a working simulator without researching every part separately, turnkey packages reduce the risk of buying equipment that does not sync properly.
DIY kits like the Golf Bays EasySim at $999 or the Impact Sports enclosure at $1,342 ship with poles, padding, and screens ready for self-assembly. Professional installation adds labor and project management, which can push total costs significantly higher. The trade-off is time and effort versus convenience. If you are comfortable with basic tools and have a helper, DIY saves money. If you want a finished room without lifting a wrench, professional installation is worth the premium.
Check three things: whether they carry enclosures in multiple sizes to fit your ceiling height, whether their launch monitors and projectors are confirmed compatible with each other, and what their return policy covers. Custom golf simulator installation providers should offer a site assessment or at least a detailed sizing consultation before you buy. Ask about post-installation technical support and how replacement parts are handled if a screen or panel wears out.
Most residential turnkey projects take two to six weeks from order to first swing. Enclosure kits from All Sport Systems, Impact Sports, and Carl's Place typically ship within days and assemble in a weekend. Custom builds with electrical work, HVAC adjustments, or acoustic treatment add one to three weeks. Commercial installations at resorts or entertainment venues often run longer because of permitting and site preparation. Confirm lead times with your provider before committing to a deadline.
Professional golf simulator setup cost varies by scope. Enclosure packages range from $999 for a compact DIY bay to $6,850 for a modular panel wall system, and the modular option includes professional assembly for an additional $3,000. Launch monitors, projectors, and software are priced separately. A complete residential build with mid-range electronics typically lands between $8,000 and $20,000. Commercial installations with custom framing and acoustic work can exceed that range.