
Customer Svc: 855-620-2330 -
M-Sat -9am-6pm
Speak To Customer Service - 855-620-2330 - M-Sat 9:00am - 6:00pm MST
Customer Svc: 855-620-2330 -
M-Sat -9am-6pm
Speak To Customer Service - 855-620-2330 - M-Sat 9:00am - 6:00pm MST

Last Updated: October 17, 2026
Simulator calibration is the process of aligning a launch monitor's sensors, target line, and software so the numbers it reports match what the ball actually did.
That matters more than most golfers realize. A simulator that reads your club path two degrees off will have you "fixing" a swing flaw you don't have.
Here's the uncomfortable truth. Your launch monitor is a measuring instrument. Like any instrument, it drifts, and it needs checking.
Below, we'll show you exactly what professional calibration covers, how to spot a setup that's gone out of spec, and how often to schedule service.
Professional calibration is not a quick software reset. It is a structured alignment and verification service that touches hardware, optics, and software together.
A thorough service typically covers these steps:
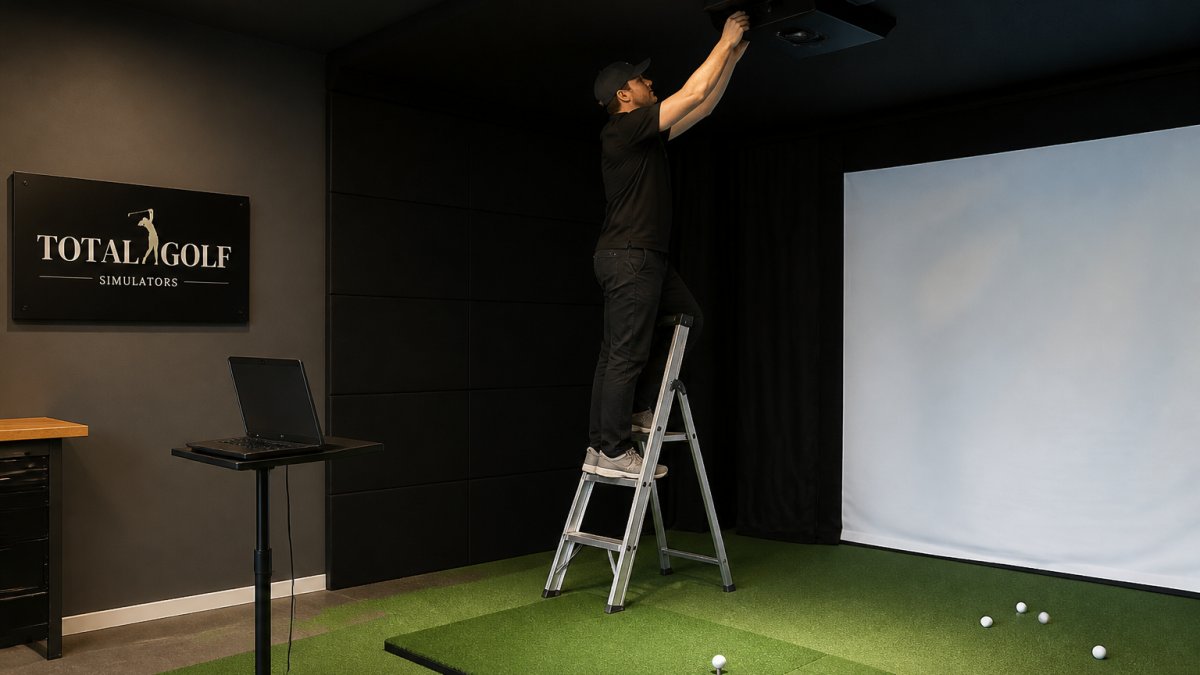
A technician on a small ladder adjusting an overhead launch monitor above a golf hitting mat, laptop open on a stand nearby showing setup software
What most guides miss is step four. Alignment without validation is guesswork. A unit can look perfectly square and still read spin wrong.
Golf simulator accuracy comes down to repeatability. A well-calibrated system reports the same shot the same way, every time, within a known tolerance.
That consistency is what makes practice worthwhile. Players improve faster when feedback is trustworthy, because they stop chasing phantom errors. When your shot dispersion chart shows a real pattern, you can actually work on it.
Here's the practical payoff:
The reverse is also true. A drifting sensor makes good swings look bad and bad swings look fine. Players then groove the wrong move.
Accuracy isn't a spec-sheet number you buy once. It's a condition you maintain. That distinction separates a useful practice bay from an expensive video game.
Swing analysis only works when the underlying data is sound. Calibration is what makes the difference between coaching insight and coaching noise.
Consider what a coach reads off the screen: swing path, face angle, attack angle, and impact location. Each of those numbers drives a specific correction. If face angle reads three degrees open when it's actually square, the student spends a month fixing nothing.
Proper calibration sharpens three things at once:
For teaching facilities, this is a business issue, not just a technical one.
Golf launch monitor setup has three layers, and calibration touches all of them. Get any one wrong and the others can't compensate.
Layer one: physical alignment. Overhead units need correct mounting height and square positioning relative to the ball.
Layer two: target line. The simulator's reported zero must match where you actually aim.
Layer three: software configuration. Firmware version, ball type settings, club selection, and data field mapping all affect what you see.
Camera-based systems and radar systems behave differently during setup. Camera units are sensitive to lighting and reflective surfaces. Radar units care more about space behind the ball and nearby interference.
Our Garmin Approach R50 uses three high-speed cameras and tracks more than 15 ball and club metrics. Our Uneekor Eye XO2 relies on photometric and infrared sensors and detects 24 data points, with a recommended ceiling mount around 9 to 10 feet.


If you run an overhead unit and share the bay between left- and right-handed players, a sliding mount changes the calibration conversation entirely. The SkyRail-LM Sliding Track Mount includes adjustable travel stops so the unit returns to a repeatable position rather than a guessed one.
Recalibration is due when your data stops matching reality. The tricky part is that drift is gradual, so you rarely notice it happening.
Watch for these warning signs:
How often should you schedule it? A practical schedule looks like this:
Garmin Approach R50 Indoor & Outdoor Launch Monitor w/Built-In Simulator →
Situation |
Recommended Cadence |
|---|---|
Home simulator, light use |
Once a year, plus after any move |
Home simulator, daily practice |
Every 6 months |
Teaching studio or commercial bay |
Every 3 to 6 months |
After firmware or hardware changes |
Immediately |
After a ball strike to the unit |
As soon as possible |
A common mistake is waiting for obvious failure. By the time readings look wrong, you've already practiced on bad data for weeks.
Golf simulator troubleshooting is really a triage exercise.
Work through the checks in order, from least invasive to most.
Stage 1: Confirm the basics.
If misreads clear here, you had a configuration or environment issue, not a calibration failure. Document what changed so you can recognize the pattern next time.
Stage 2: Isolate the variable.
This stage tells you whether the fault is shot-specific or system-wide. A single club that misreads points to a club-data setting or a reflective clubhead.
Stage 3: Know when to stop.
Stop adjusting and call a professional when any of these are true:
That last point matters. Verifying squareness and mounting height to a manufacturer's spec usually requires a laser level, a plumb line, or a measured reference the average owner does not own.
A useful rule of thumb: if you have made more than two adjustments without a measurable improvement, you are past the DIY zone. A professional visit at that point is more effective than the weeks of practice you will spend on data you cannot trust.
Golf simulator maintenance is what keeps calibration from undoing itself.
Build your schedule around four drivers: usage volume, equipment movement, software changes, and environmental stability.
Usage volume. Light home use tolerates an annual professional calibration plus a mid-year validation.
Equipment movement. Any time the unit is bumped, remounted, or moved, including a sliding mount repositioned between left- and right-handed players, treat calibration as due. A sliding track with adjustable travel stops returns the unit to a repeatable position, but repeatable is not the same as verified.
Software changes. Firmware and software updates can change how metrics are reported, even on the same hardware.
Environmental stability. Dust, humidity, and temperature swings affect optics and electronics. A garage bay that swings from cold to hot will need more frequent lens cleaning and validation than a climate-controlled room.
Here is a practical year-round cadence:
Interval |
Action |
|---|---|
Monthly |
Wipe down sensor lenses; check mounting hardware for looseness |
Quarterly |
Review firmware; clean the hitting mat; check for screen wear |
After any move or mount change |
Re-validate target line and run a short test-shot session |
After any firmware or software update |
Re-run setup wizard and validation session |
Seasonally |
Run a validation session and compare against your baseline numbers |
Annually (or per usage tier) |
Book professional calibration and document the results |
A validation session is the piece most owners skip.
When you are building or upgrading a bay, the equipment choices shape how much maintenance you will face. Units like our ProTee VX use dual high-speed cameras with marker-free club tracking and no moving hardware, which suits high-traffic setups where frequent recalibration would otherwise eat into revenue hours.

ProTee VX Launch Monitor
Most home setups benefit from a professional calibration check once a year, plus a quick alignment check any time the unit is bumped, moved, or reinstalled. Commercial bays and teaching studios that run hundreds of shots a day should schedule service every six months. Overhead units mounted on a fixed rail hold alignment well, but ceiling hardware can shift with building vibration, so a yearly verification keeps shot data honest.
Watch for carry distances that suddenly jump or drop by 10 yards or more, shots that read as straight but finish offline on course, spin numbers that look impossible for the club you hit, or a shot dispersion chart that clusters away from your target line. Misreads on well-struck shots and inconsistent ball speed from swing to swing are also red flags. Any of these means it is time for a calibration check.
Yes. Sensor alignment, target line verification, and software configuration all directly affect how accurately a launch monitor reads ball speed, launch angle, spin rate, and club path. A properly calibrated unit gives you data you can trust in practice, which matters most for golf simulator accuracy during swing changes. If the unit is misaligned, every practice session reinforces bad feedback instead of correcting it.
Some steps are DIY-friendly: checking that the unit is level, confirming the target line, and running the manufacturer's built-in alignment routine. Deeper calibration, including camera focus, sensor tolerances, and software verification against known shot data, is best handled by a technician. If you own an overhead unit like the Uneekor Eye XO2, follow the included calibration chart carefully and call for service if readings stay inconsistent after a basic alignment check.
Trusting bad data is worse than having no data at all. If your simulator has been running for a season without a check, the numbers on screen may no longer match your swing. Total Golf Simulators helps you build a setup that stays accurate, with premium launch monitors, expert guidance, and turnkey solutions for home and commercial spaces. Explore our simulator lineup and get the right system for your room, your goals, and your budget.