
Customer Svc: 855-620-2330 -
M-Sat -9am-6pm
Speak To Customer Service - 855-620-2330 - M-Sat 9:00am - 6:00pm MST
Customer Svc: 855-620-2330 -
M-Sat -9am-6pm
Speak To Customer Service - 855-620-2330 - M-Sat 9:00am - 6:00pm MST

Last Updated: October 12, 2026
Building a home golf simulator setup starts with honest space assessment. Most golfers underestimate how much room they need, then struggle with swing clearance or poor ball tracking.
Minimum requirements depend on setup type. A basic simulator needs at least 10 feet wide, 15 feet deep, and 8.5 feet tall. Most professionals recommend 12 feet wide, 18 feet deep, and 9-10 feet tall for comfortable swing clearance.
A 10-foot ceiling gives breathing room, but 9-10 feet is ideal.
Floor space matters just as much. Your hitting area needs at least 3 feet of depth for stance and swing.
Width-wise, 10 feet is workable but tight. Twelve feet is comfortable. Anything wider than 15 feet wastes space for a single-bay setup.
Measure carefully before buying anything. Use this framework:
Width measurement: From wall to wall where your enclosure will sit. Mark where the screen will hang. Measure 3 feet forward from the screen, that's your approximate hitting position. You need at least 18 inches of clear space on each side of your body. Under 10 feet wide means minimal margin.
Depth measurement: From the wall behind the screen to the opposite wall. Subtract 8-12 inches for screen clearance. Subtract 8-10 feet for projector throw distance. Subtract 3 feet for your hitting zone. Whatever remains is your ball flight zone.
Ceiling height: Measure from floor to lowest point in the ceiling. Vaulted ceilings? Measure at the lowest point where you'll swing. Account for recessed lighting and sprinkler heads.
Your room choice determines installation complexity, reversibility, climate control needs, and how the space functions when you're not golfing. Garages are most popular, but not always best.
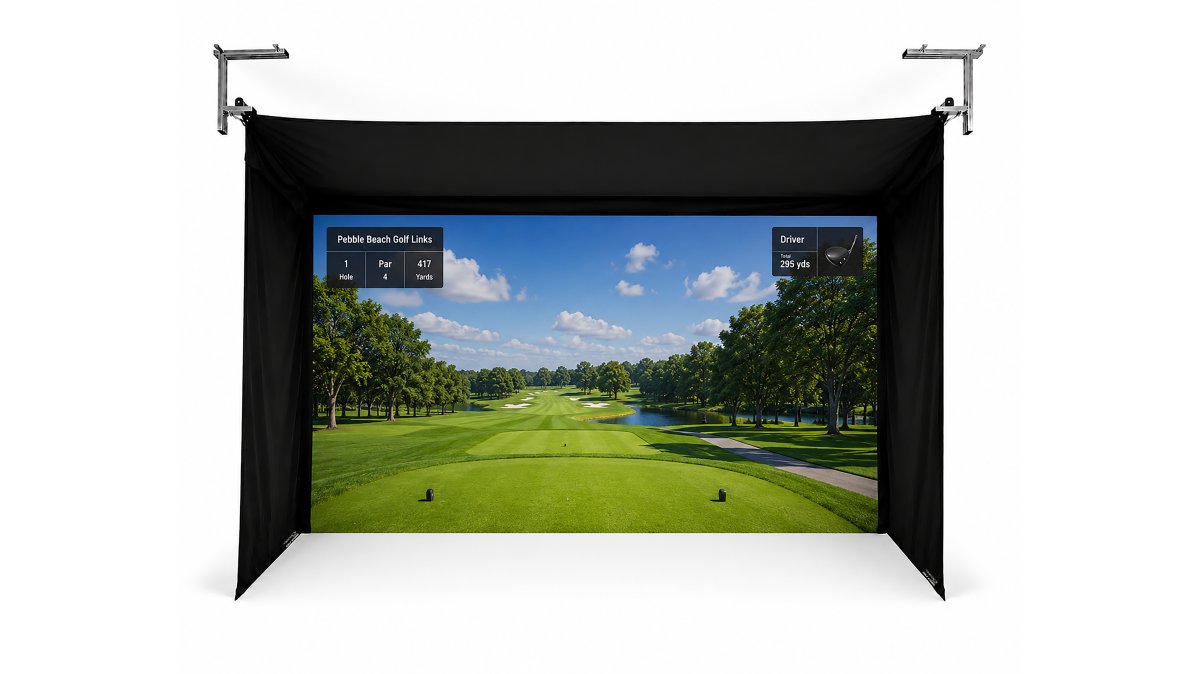
Garages offer obvious appeal: separate space, existing electrical, and they're already designed for storage and equipment.

Garage advantages are real. You're not converting living space. Installation is straightforward. Electrical outlets are usually accessible. Concrete flooring handles moisture well.
But garages have hidden costs. Concrete gets cold in winter, affecting ball flight data. Garage doors aren't insulated well, temperature swings are dramatic, and humidity control is poor.
Basements are underrated. They're naturally climate-controlled, moisture is manageable with a dehumidifier, and temperature stays stable year-round.
Spare rooms work if you have the space. Bedrooms or formal dining rooms can become simulators.
Sheds are popular but problematic. They're typically uninsulated, temperature swings are extreme, humidity is difficult to control, and electrical access is limited.
This is where many golfers make their best choice: a setup that can be taken down or folded away when the space needs another purpose.
The Impact Sports Space Saving Collapsible Enclosure is built for this.

The Vanish Series Retractable Golf Enclosure takes this further, it rolls up and out of the way in seconds, giving you a completely open room when you're done.
For multi-purpose spaces, these enclosures are worth the premium.
Your enclosure is the foundation of a home golf simulator setup, providing realism and safety. It contains ball flight, absorbs impact, protects your walls and ceiling, and frames the projected image.
Enclosure options range from budget DIY kits to turnkey professional systems. The choice depends on your space, budget, and willingness to assemble.
The Golf Bays EasySim DIY Golf Simulator Enclosure is the most affordable entry point at $999.00.
For semi-permanent setups, the Impact Sports Space Saving Collapsible Enclosure at $1,999.00 folds flat against the wall.
If you want a fully integrated, turnkey solution, the SimBooth 1 at $7,495.00 includes the enclosure, turf, and flooring.
The Vanish Series Retractable Golf Enclosure at $2,999.00 is the most versatile for reversible setups.
Most DIY enclosures follow this pattern:
Tools you'll need:
Materials (varies by enclosure, but typically includes):
Assembly steps:
Lay out your frame on the floor. Assemble the bottom perimeter first. Connect corners with fittings. Use a level to ensure squareness. This takes 20-30 minutes.
Stand up the vertical poles. Attach side poles to corner connectors. Have a helper stabilize while you tighten. Check vertical alignment with a level.
Install the top frame. Connect horizontal poles across the top. Get the height right before fully tightening.
Mount the frame to the floor or ceiling. If floor-mounting, use lag bolts into concrete. If ceiling-mounting, locate studs or joists and use appropriate fasteners. This is the most critical step for safety.
Attach the impact screen. Stretch it tight and secure with bungees or clips. The screen should be taut but not over-tensioned.
Install side and top fabric. Attach black surround fabric to create visual containment. This takes 30-45 minutes.
Test for stability. Push on the frame from different angles. It should feel rock-solid. If it flexes, tighten connections.
Total assembly time: 2-4 hours depending on enclosure type and experience.
Your launch monitor is the brain of your simulator. Placement affects data accuracy more than most golfers realize.
Launch monitors work by tracking ball flight data, spin rate, launch angle, ball speed, carry distance.
Most launch monitors mount behind or beside the hitting position.
Mount it on a stable surface. A tripod works, but a fixed bracket is better.
Impact Sports - Space Saving Collapsible Enclosure - Custom Sizes Available →
Compatibility matters. Your launch monitor must work with your simulator software.
Your hitting mat directly affects launch monitor accuracy. A poor mat surface confuses the camera and produces unreliable data.
The mat should be 4-5 feet wide and 5-6 feet deep.
Quality matters. Cheap mats compress unevenly, creating inconsistent contact points.
The mat should have a distinct hitting zone, usually a lighter stripe or marked area. This helps you position consistently.
Your projector creates the visual experience. Placement and calibration determine how realistic the course looks.
Throw distance is the distance from projector to screen. It determines image size and sharpness.
Short-throw projectors (0.5-1.0 throw ratio) mount 6-10 feet from the screen and produce large images.
Mounting options: ceiling-mount (most common), wall-mount, or enclosure-mounted.

For most home setups, ceiling-mounting is standard. Position the projector so the image center aligns with the screen center.
Once mounted, calibration is critical. The image must be square to the screen, no keystoning, no trapezoid distortion.
Use your projector's keystone correction feature to square up the image.
Next, adjust brightness and contrast. Your simulator software should display a calibration pattern.
Color calibration matters for course realism.
Finally, focus the image. Use the projector's focus ring to sharpen the image edge.
Realism extends beyond the visual. Temperature, lighting, sound, and ball containment all contribute to how the simulator feels.
Ball rebound is the biggest safety issue most people overlook.
Side netting or padding prevents this. Most enclosures include side screens, but verify coverage.
For overhead protection, consider ceiling netting if you're in a basement or garage where balls could hit fixtures.
Some enclosures include optional foam wedges or baffle nets that reduce ball rebound velocity.
Lighting affects both realism and comfort. Dim, indirect lighting is ideal.
Consider installing dimmable LED lighting. Position lights to avoid casting shadows on the screen.
Ventilation matters more than most golfers realize.
Install a small exhaust fan if possible.
Temperature control is critical for equipment longevity. Ideally, keep your simulator space between 65-75°F.
In winter, a small space heater maintains temperature.
Total cost depends on your enclosure choice and optional accessories.
Budget setup ($2,500-3,500):
Mid-range setup ($5,000-7,000):
Premium setup ($10,000-15,000+):
Budget setups take 2-4 hours to assemble. Mid-range setups take 4-8 hours.
Common mistakes to avoid:
Undersizing your space. Most golfers regret not making their space bigger.
Skimping on the enclosure.
Poor launch monitor placement. Mounting it in the wrong spot produces unreliable data.
Inadequate lighting control. Too much ambient light washes out the projected image.
Ignoring climate control. Temperature swings damage equipment.
Not testing before fully committing.
Building a home golf simulator transforms how you practice. Shop golf simulators with confidence, knowing you're building a setup designed to last and perform. Golf simulator room planning guide covers detailed specifications for each space type.
Most home golf simulators require a minimum ceiling height of 8.5 feet, with 9 to 10 feet being ideal for unrestricted swing clearance. If your ceiling is lower, look for enclosures designed for compact spaces, some are engineered to work in spaces as tight as 8 feet. The Carl's Place DIY Golf Simulator Enclosure is optimized for standard residential ceilings and works well in 8.5-foot spaces when paired with a short-swing practice approach.
Yes, a 10-foot ceiling works well for a garage golf simulator setup. This height gives you adequate swing clearance and room for a projector mounted overhead or on a sliding rail system like the SkyRail+ Enclosure Attached Projector Mount. Ensure you have at least 15 to 18 feet of depth for the complete setup, hitting zone, ball flight space, and projector distance. A garage can be a practical space for a golf simulator.
The most budget-friendly option is the Golf Bays EasySim DIY Golf Simulator Enclosure at $999, which includes the frame, fabric surround, and impact screen. Add a basic hitting mat and a used or entry-level launch monitor, and you can build a functional setup for $2,000 to $2,500 total. The Carl's Place DIY Golf Simulator Enclosure ($1,149.95) is another affordable choice with full-floor image coverage. Both support most launch monitors and work with standard projectors, giving you flexibility to upgrade components over time.
Realism depends on four factors: accurate launch monitor data, proper screen alignment, realistic lighting, and unrestricted swing clearance. Use a launch monitor compatible with your enclosure, SkyTrak, Foresight, or Garmin Approach R50 are industry standards. Ensure your projector is mounted at the correct throw distance and the image fills your impact screen edge-to-edge. Add indirect lighting to reduce glare, and position your hitting mat 10 to 12 feet from the screen to simulate real ball flight. The Impact Sports Space Saving Collapsible Enclosure or Vanish Series Retractable Golf Enclosure both support professional-grade setups that deliver genuine course feel.