
Customer Svc: 855-620-2330 -
M-Sat -9am-6pm
Speak To Customer Service - 855-620-2330 - M-Sat 9:00am - 6:00pm MST
Customer Svc: 855-620-2330 -
M-Sat -9am-6pm
Speak To Customer Service - 855-620-2330 - M-Sat 9:00am - 6:00pm MST

Last Updated: September 13, 2026
Commercial golf simulator setup requirements begin with three measurements: ceiling height, bay depth, and room width. Get these wrong and no amount of premium equipment will save the build.
A commercial bay needs height for a full swing, depth for ball flight, and width for a golfer to stand safely beside the sensor. Miss one and you're rebuilding, not installing.
Ceiling height kills the most projects. A driver swing needs roughly 10 feet of clearance for taller players; under 9 feet forces compromises on club selection (golftec.com).
Depth covers the hitting mat, ball travel to the screen, and space behind the golfer for a safe backswing. Width determines whether two people share a bay comfortably or you're limited to solo play.
Enclosure dimensions, hitting mat quality, and projector throw distance form the equipment triangle. Each constrains the others, so specify them together.
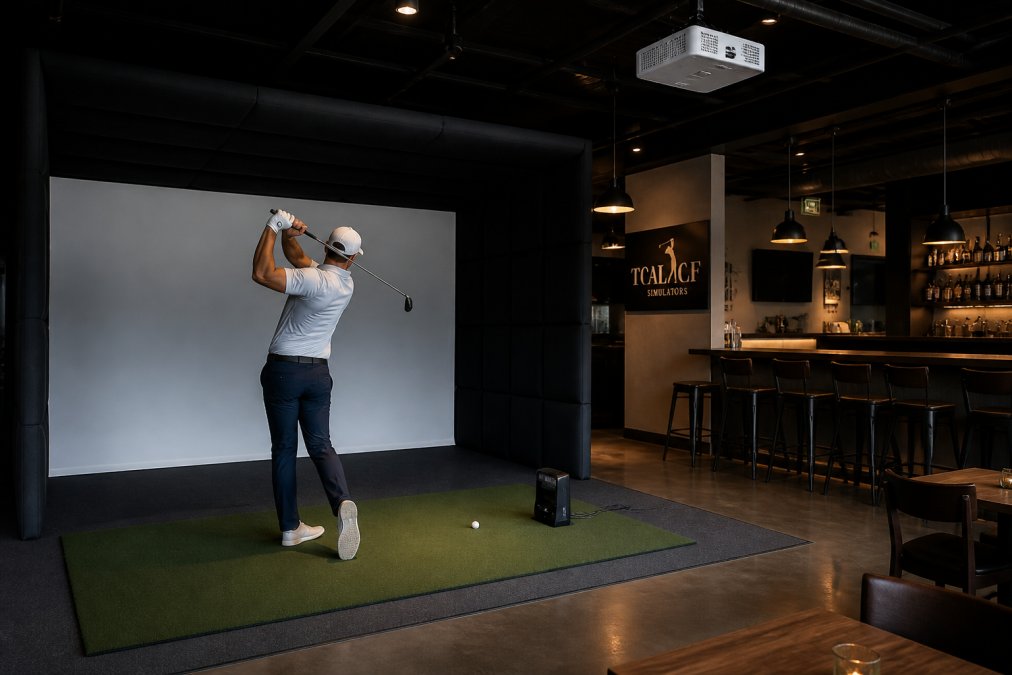
For enclosures, the DIY Golf Enclosure System product page offers a modular starting point that works across most launch monitors. Serious commercial venues often step up to a premium customizable impact screen enclosure for sharper visuals and heavier daily use.

Projector throw distance determines mounting: short-throw projectors sit close to the screen, standard throw models need more depth behind the hitting area. A mismatched aspect ratio crops the image and wastes screen space.
Turf density on the hitting mat decides how the club interacts with the surface. Thin mats feel harsh and wear out fast under commercial traffic.
Electrical load, lighting control, and HVAC separate a hobby setup from a facility running twelve hours a day. Commercial bays draw more power, generate more heat, and need lighting that doesn't wash out the projected image.
A single bay running a launch monitor, projector, computer, and lighting can pull more current than a residential circuit provides. Multi-bay facilities need a dedicated panel and proper circuit distribution.
Lighting is counterintuitive: enough ambient light for safety and staff movement, but too much washes out the screen. Directional, dimmable fixtures solve this.
Simulator bays trap heat from projectors, computers, and bodies. Without airflow management, equipment overheats and customers leave uncomfortable.
Safety netting, occupancy load calculations, and fire suppression are code issues, not optional upgrades. Inspectors check these before you open.
Netting protects adjacent bays and walkways from stray balls, even with an impact screen, mis-hits and ricochets happen. Commercial facilities need netting rated for your launch monitors' ball speeds.
Occupancy load determines how many people your space can legally hold, affecting furniture layout and exit requirements. Fire suppression and egress planning follow from that number.
ADA compliance and multi-bay layout planning are the requirements most guides skip, and where commercial builds succeed or fail.
Accessibility means more than a ramp. Under the 2010 ADA Standards for Accessible Design, the requirements that hit simulator venues hardest govern approach routes, door clearances, and accessible seating positions (ada.gov). Operators who get this right designate at least one bay as fully accessible and build the rest to standard commercial dimensions.
Multi-bay configuration shapes the whole floor plan. Shared walls, sound isolation, and sight lines all affect the customer experience, a golfer in bay three shouldn't hear every shot from bay two.
Most commercial venues land on one of three layouts:
The floor plan is a revenue decision. A linear layout may fit more bays in a narrow shell, but an island layout usually supports higher food-and-beverage attachment because groups linger. Sketch two versions and compare:
A plan that adds one bay but kills the seating area often loses money. A plan that trades one bay for a real social zone often makes more.
Turnkey installation cost varies with enclosure size, launch monitor tier, and whether you're converting existing space or building new. For a commercial venue, equipment is often the smaller part of the number.
A quality enclosure starts in the low thousands and scales with customization; premium modular enclosures built for commercial daily use run considerably higher. Add a launch monitor, projector, hitting mat, and computer, and the total climbs quickly.
Installation adds labor, electrical work, and structural modifications. A dedicated room conversion costs more than an already-wired, climate-controlled garage bay.
Most first-time operators budget for equipment and stop there. The categories that blow up a commercial budget are tied to the building, not the bay:
For commercial operators, you're not buying equipment, you're investing in revenue per square foot. A bay generating hourly revenue justifies a higher upfront spend than a home setup used a few times a week.
The formula most operators use is simple:
Annual bay revenue = hourly rate × hours booked per week × 52
Then divide by the square footage that bay occupies, including its share of circulation and seating, to get revenue per square foot. Compare that to your rent per square foot. If bay revenue per square foot doesn't comfortably exceed rent plus operating cost per square foot, the layout needs to change, not the equipment.
A few practical levers:
Don't underestimate recurring costs: launch monitor software subscriptions, turf replacement, projector lamp or laser life, and netting wear all recur. A plan that ignores maintenance will surprise you in year two.
Zoning regulations may also restrict where you can operate, so confirm permitted use before signing anything. A shell that's zoned for retail may not be permitted for a recreational use with extended hours, and the fix is rarely cheap.
A commercial golf simulator business plan starts with the space, not the equipment. Room dimensions determine bay count, bay count determines capacity, and capacity determines your revenue ceiling.
Work backward from the numbers. If your space supports four bays and each serves one foursome per hour, that's your throughput, pricing, staffing, and hours follow.
The U.S. Small Business Administration's business planning resources offer a useful framework for projecting startup costs and revenue, though simulator-specific benchmarks come from industry operators rather than general templates.
Liability insurance deserves its own line item, commercial facilities carry risk home setups don't. Zoning may also restrict where you can operate, so confirm permitted use before signing anything.
The gap between a simulator that works and one that frustrates customers comes down to planning, not equipment. Ceiling height, bay depth, electrical capacity, and code compliance must be right before the first ball is hit.
Total Golf Simulators helps operators and homeowners get those requirements right from the start. Our Price Match Guarantee, free shipping on most items, and step-by-step simulator guide take the guesswork out of specification. Use our Simulator Finder Quiz to match a setup to your actual space and budget, or talk to our team about commercial configurations before you commit to a lease.
Get started with Total Golf Simulators and build a bay that performs from day one.
Plan for at least 10 feet of ceiling height, and 11 to 12 feet is safer for drivers and taller players. The launch monitor needs a clear path to track ball flight, so a ceiling-mounted unit adds a few inches of clearance below the sensor. If your space tops out at 9 feet, a camera-based launch monitor placed in front of the golfer rather than overhead is the workable option.
Each bay needs roughly 10 feet of width and 15 to 16 feet of depth from the hitting mat to the impact screen. Add 3 to 4 feet of buffer behind the mat for the golfer's backswing and follow-through. A four-bay facility typically lands between 800 and 1,200 square feet once you account for walkways, a control counter, and seating.
Each bay draws roughly 10 to 20 amps at 120 volts once you add the projector, launch monitor, computer, and lighting. A four-bay build should have dedicated 20-amp circuits per bay rather than shared runs. For HVAC, budget 400 to 600 CFM of conditioned air per bay and keep the thermostat between 68 and 72 degrees Fahrenheit, since launch monitor cameras and projectors drift when the room overheats.
Enclosure pricing gives you a starting reference: the DIY Golf Enclosure System starts at $1,349, the Vanish Series Retractable Enclosure is $2,999, the Pro Enclosure Kit is $3,409.95, and the Modular Bay Enclosure with Premium Panel Wall System runs $6,850. Add launch monitor, projector, hitting mat, turf, and installation labor on top. A turnkey build bundles all of it into one quoted price.
Lead with revenue per square foot, not equipment lists. Show bay count, projected hourly rate, utilization percentage, and the food and beverage attach rate. Then document your permitting path, zoning classification, ADA compliance, and liability insurance limits. Lenders want proof the space can carry the debt service, so model a conservative 40 percent utilization in year one and show break-even.
Yes, if the facility is open to the public. The 2010 ADA Standards for Accessible Design require an accessible route to each bay, a 30 by 48 inch clear floor space at the hitting area, and reachable controls. Wheelchair users need enough turning radius to position behind the mat, which usually means widening at least one bay rather than building every bay to the same width.
Use a dense, low-nap turf rated for commercial traffic over a padded subfloor. Turf density matters more than pile height: a face weight around 40 to 60 ounces per square yard holds up to thousands of swings without matting down. Check that the turf accepts tee insertion and that the subfloor deadens the sound of a mishit, since noise complaints drive complaints in shared buildings.