
Customer Svc: 855-620-2330 -
M-Sat -9am-6pm
Speak To Customer Service - 855-620-2330 - M-Sat 9:00am - 6:00pm MST
Customer Svc: 855-620-2330 -
M-Sat -9am-6pm
Speak To Customer Service - 855-620-2330 - M-Sat 9:00am - 6:00pm MST

Last Updated: October 14, 2026
Safety netting installation for your golf simulator starts with honest measurement: ceiling height, wall dimensions, and actual clearance. Most people skip this step and regret it.

Measure ceiling height from floor to the lowest point, including exposed beams, pipes, or ductwork. This determines whether you can swing a full driver or need to modify your setup.
Next, measure room length and width. Your hitting area needs at least 10 feet of depth from the hitting position to the back wall.
Ceiling height under 9 feet creates real problems, you can't swing a driver without hitting the ceiling. We recommend a minimum of 10 feet for a full swing.
Check for obstacles above your hitting area, light fixtures, ceiling fans, sprinkler heads, HVAC vents.
Measure from your hitting mat to the back wall: at least 10 feet. If you use an impact screen, you need space behind it for the projector and rebound netting.
Your hitting area should be at least 10 feet wide and 10 feet deep; 12-by-15 feet feels comfortable for most golfers. Narrower than 10 feet and you'll clip the side netting on normal shots.
Mark your hitting position on the floor, then measure 10 feet behind it, your minimum depth. Add 2-3 feet if you can, for breathing room and full-swing capture.
Write down your final dimensions. You'll use these numbers when ordering netting and frame materials.
Your frame holds everything together. You have two choices: EMT conduit or steel pipe. Both work; the difference is cost and durability.
EMT conduit is lighter, cheaper, and easy to cut and assemble, most DIY setups use it. The downside: it can bend under load if you over-tension your netting.
Steel pipe is heavier, more expensive, and won't bend. It's overkill for most home setups but the right choice for commercial installations with heavy use.
EMT (electrical metallic tubing) is 3/4-inch aluminum conduit available at any hardware store. It costs less than steel pipe and weighs half as much.
EMT has one real limitation: it's not as rigid under tension. Pull your netting very tight and the frame can bow slightly, not a safety issue, just something to know.
Steel pipe is 3/4-inch black iron pipe, heavier and stronger. For a commercial enclosure or a 10-year setup, steel pipe makes sense. For a home setup, EMT is fine.
Start with four vertical posts, one at each corner of your hitting area.
For a 10-by-10-foot space, cut your verticals to your ceiling height minus 2 inches. This leaves room for your crossbars on top.
Next, install crossbars front-to-back and side-to-side on top of your verticals, creating a grid that holds your netting. Use at least two running the length and two running the width.
Secure all connections with set screws or bolts. Tighten by hand first, then with a wrench, snug, not crushed.
Top netting catches balls that fly high, non-negotiable. A hard-hit ball travels fast, and you need protection for your ceiling, light fixtures, and anything above your hitting area.
Your top netting should extend from your back wall to at least 2 feet in front of your hitting position. This catches even the most forward-hit balls.
Use aircraft cable (wire rope) to hang your netting, stronger than rope and it doesn't stretch. Use at least 1/8-inch diameter.
Attach the cable to your crossbars with eye hooks: drill through the crossbar and install each hook with a bolt and washer.
Use turnbuckles to tension the cable. A turnbuckle is a threaded connector that lets you tighten the cable after installation.
Proper tension is critical: loose netting sags, over-tensioned netting can tear or pull your frame out of alignment.
Tighten each turnbuckle by hand, slowly, until you feel resistance but not strain. Then use a wrench for one more quarter-turn.
Step back: the netting should be taut but not drum-tight. If a sag exceeds 2 inches, tighten the nearest turnbuckle another quarter-turn.
Check tension monthly, netting stretches over time, so expect to re-tighten turnbuckles a few times in the first year.
Side netting catches shots that miss the hitting area to the left or right. These shots are inevitable. Side netting protects your walls, windows, and equipment.

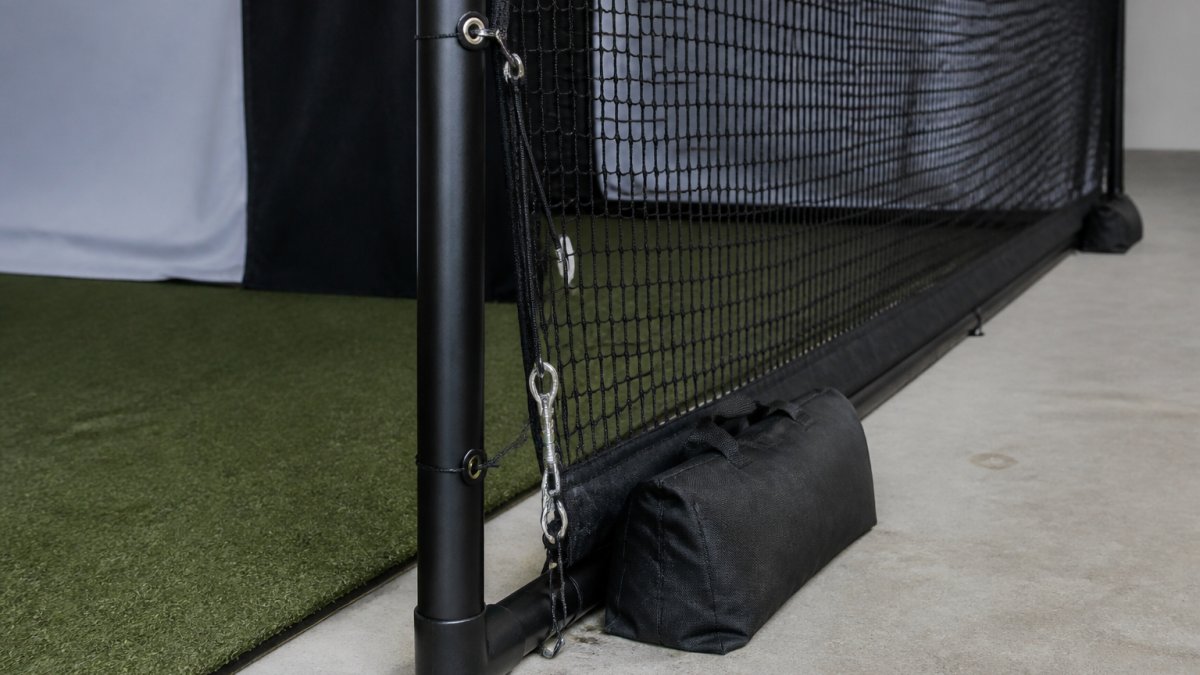
Your side netting should extend from the floor to your ceiling height. It should run the full depth of your space.
You have two installation methods. Eye hooks are simple and cheap. Curtain track is more professional and lets you remove panels easily.
For eye hooks, drill holes along your vertical posts at 12-inch intervals. Install the eye hooks with bolts and washers.
For curtain track, mount the track along your vertical posts and ceiling. Slide the netting panels into the track.
Eye hooks are recommended for permanent installations. They're cheaper and don't require special hardware.
Cables alone aren't enough. Your side netting needs weight at the bottom to keep it from flapping and to prevent balls from rolling under it.
Use sandbags. Fill them with sand or pea gravel and place them along the bottom edge of your netting. Use at least two sandbags per side. Each bag should weigh 25-40 pounds.
You can also use cable along the bottom edge, tensioned with turnbuckles. This is more permanent than sandbags but requires more installation time.
This section ties everything together. Your cables, hooks, and sleeves are what actually hold your netting in place during use.
Wire rope is the backbone of your installation. It doesn't stretch, doesn't rot, and lasts for years. Use 1/8-inch diameter cable for most installations.
Run cable along every edge of your netting. Front edge, back edge, side edges. Use eye hooks every 3-4 feet to attach the cable to your frame.
All Sports Systems - SkyGuard Top & Side Enclosure Safety Netting - Match →
Drill your eye hook holes carefully. Use a drill bit that matches your bolt diameter.
Attach your cable to the eye hook using a cable clamp. A cable clamp is a U-shaped bracket that grips the cable. Use at least two clamps per attachment point.
Fabric sleeves slide over your cable and grip your netting. Sew them to the netting with heavy thread. Use a needle designed for canvas or leather. Make your stitches close together, about 1/4-inch apart.
Space your sleeves every 12-18 inches along the cable. This distributes the load evenly and prevents tearing.
For a permanent installation, this method is stronger than velcro or clips. The stitching locks the netting in place. It won't shift or sag.
Curtain track gives you flexibility. You can slide panels open and closed. This is useful if your simulator room is multi-purpose.
Curtain track mounts to your walls and ceiling. It holds netting panels that slide along the track. You can open it completely or leave it partially closed.
Install the track along your vertical posts and across your ceiling. Use brackets every 18 inches. Mount the brackets with bolts into your frame or with anchors into your walls.
Make sure the track is level. Use a level tool to check. A sloped track will cause your panels to slide on their own.
Install the track so it's at least 2 inches away from your walls. This gives your netting panels room to slide without catching on edges.
Cut your netting panels to fit your track. Each panel should be as tall as your space and as wide as your track opening.
Slide the panels into the track. Most tracks have a groove that holds the netting.
Adjust each panel so it's straight and not twisted. Twisted panels don't slide smoothly and can tear.
Test the panels by sliding them open and closed several times. They should move smoothly. If they stick, check for obstructions or misalignment.
Safety comes first. Your netting system needs regular inspection. Small problems now prevent big problems later.
Check your netting every month. Look for tears, loose cables, and bent frame pieces. Catch problems early.
Hit some balls and watch how your netting responds. It should stop the ball cleanly without excessive bounce-back.
If your netting bounces balls back hard, your tension might be too tight. Loosen your turnbuckles slightly.
If your netting sags deeply when a ball hits it, tighten your turnbuckles.
Proper tension feels like a firm but slightly forgiving surface. The netting absorbs the impact without bouncing the ball back at you.
Look for small tears in the netting. Tears grow over time. A 1-inch tear becomes a 12-inch tear within a few months of use.
Check all your cable clamps. They should be tight. Use a wrench to check each one monthly.
Look at your eye hooks. They should sit flush against the frame. If they're loose, tighten the bolt.
Check your fabric sleeves. They should grip the cable without slipping. If a sleeve is loose, re-sew it or replace it.
Netting lasts about 5-7 years with regular use. Eventually, the fibers break down and the netting becomes weak.
When you see widespread small tears or the netting feels thin, it's time to replace it.
Clean your netting twice a year. Use a soft brush and mild soap. Dirt and debris can weaken the fibers.
Store any removable panels indoors during off-season. UV light breaks down netting fibers. Covered storage extends the life of your netting.
Most installation problems come from skipping steps or cutting corners.
Installing netting without proper frame tension. A loose frame can't hold netting properly.
Using rope instead of cable. Rope stretches. Your netting will sag within weeks.
Over-tensioning the netting. Tight netting tears easily. Aim for taut, not drum-tight.
Not checking tension regularly. Netting stretches.
Installing netting without proper clearance. Make sure your netting doesn't interfere with your swing.
The American Society of Golf Course Architects standards for golf facility design recommend minimum clearances that apply to home simulators.
Building a safe golf simulator enclosure takes planning and attention to detail.
Start by assembling your frame using EMT conduit or pipe, then hang top netting from crossbars using wire rope and turnbuckles. Attach side netting using eye hooks, cables, or curtain track mounted to walls. Secure all attachment points with turnbuckles or fabric sleeves, and tighten the netting until there is minimal sag. Test the installation by hitting practice balls to verify containment before regular use.
Use wire rope with eye hooks and turnbuckles for permanent installations, or fabric sleeves for quick attachment. For side netting, mount panels using curtain track or angle brackets with cable ties. Sandbags at the bottom of side panels add stability. Ensure all cables are tightened evenly to maintain consistent net tension and prevent sag that could allow ball escape.
Rear netting should protect the full width and height behind the hitting screen.
Yes, side netting is critical for safety and ball containment. Side-shank protection nets catch errant shots that veer left or right, preventing balls from leaving your hitting area and reducing ricochet risk. Without side netting, stray shots can damage walls, furniture, or injure people outside the enclosure. Side netting also allows you to practice with confidence knowing the ball will stay contained.