
Customer Svc: 855-620-2330 -
M-Sat -9am-6pm
Speak To Customer Service - 855-620-2330 - M-Sat 9:00am - 6:00pm MST
Customer Svc: 855-620-2330 -
M-Sat -9am-6pm
Speak To Customer Service - 855-620-2330 - M-Sat 9:00am - 6:00pm MST

Last Updated: November 7, 2026
Quick Summary
Pipe framing kits bundle pre-cut EMT steel pipes, corner connectors, and tensioning hardware into the rigid frame that holds your impact screen and side netting. Most kits use 1-inch EMT conduit, so match pipe diameter to fitting style before buying. A basic Pipe Framing Kit costs $389.95 for buyers adding a frame to an existing enclosure.
A pipe framing kit is the structural backbone of a golf simulator enclosure: a bundle of pre-cut metal tubes, corner fittings, and connectors that assembles into the rigid frame holding your impact screen and side netting. The frame is the part buyers often underestimate. The screen gets the attention, but the frame decides whether the whole bay stays square, tight, and safe over time.
Sagging screens, wobbly bays, and loose-pole rebounds can often trace back to how the pipes were cut, fitted, and anchored.
A typical kit includes:
Some kits ship complete; others send fittings only and expect you to source conduit locally. That difference changes your total cost and your weekend.
The best pipe framing kits match your enclosure's exact dimensions, include labeled pre-cut pipes, and ship with the corner fittings needed for a rigid frame.
Kit |
Price |
What's Included |
Best For |
|---|---|---|---|
Pipe Framing Kit |
$389.95 |
Pre-cut pipes and connectors |
Buyers adding a frame to an enclosure kit |
DIY Golf Enclosure System, 5 Sizes |
$1,349.00 |
Screen, RipStop wrapper, bungees, corner connectors |
Complete bays in 8x10 to 9x14 footprints |
DIY Enclosure, Poles & Padding Included |
$1,342.00 |
Screen, walls, full pole system, interior padding |
Buyers who want padding and poles in one order |
EasySim DIY Enclosure w/ Poles |
$999.00 |
Aluminum clicker tubing, surround fabric, Lite screen |
Tight spaces and tighter budgets |
Carl's Place DIY Kit with Impact Screen |
$1,149.95 |
Nylon enclosure, impact screen, steel fittings |
Mixing your own pipes with a proven enclosure |
Price
View the Pipe Framing Kit if you already own an enclosure and need the structural parts.
Compatibility comes down to pipe diameter and connector style. Most kits here use 1-inch EMT conduit, the standard steel tube sold at hardware stores. The Carl's Place kit ships steel corner fittings and offers its own Pipe Framing Kit; the DIY Golf Enclosure System includes heavy-duty corner connectors for 1-inch EMT poles, with a pole kit as an optional upgrade. Match the fitting to the pipe and assembly is straightforward; mismatch them and you're driving to the store mid-build.
EMT steel is generally preferred for golf simulator frames because it is rigid and widely available at hardware stores.
The trade-offs are real. EMT is heavier to move and needs a rubber mallet to seat fittings. PVC is lighter and cuts with a hand saw, but a frame that flexes under ball impact won't hold a taut screen. If you're weighing permanent against take-down, see our guide to alternatives to permanent golf simulator enclosures.
Sizing decides everything else. A DIY golf simulator enclosure needs enough width for your swing, depth for ball flight, and height for a full driver follow-through. Don't start with the enclosure you like and fit the room around it, measure the room, subtract clearance, and let the frame size fall out of the math.
Measure your room carefully before choosing an enclosure, since height, width, and depth each constrain how much swing space you will have.
Measure clear width, depth, and ceiling height at the hitting position, not the doorway, then subtract the space the frame and screen will occupy.
Plan depth across three zones: the hitting zone, the ball flight path, and the projector throw distance. Projector type affects how much throw distance you will need.
Ceiling height is one of the key constraints for a home bay. Check clearance between the frame top and the ceiling, and test your swing follow-through before committing to a size. For more on planning, see our home golf simulator space planning guide.
A centered hitting position is generally recommended, since the ball starts mid-screen and mishits have more screen and netting around them. If your room forces an offset, add width on the ball-strike side and confirm the side netting extends well past your swing arc. Left- and right-handed players sharing a bay generally need either a centered position or a wider enclosure.
Screen size and projector throw are linked. Measure your projector's throw ratio before picking frame depth, and match frame width to image width so the image fills the screen without cropping.
Before you buy, confirm clear ceiling height at the hitting position (not the doorway), clear width at the screen wall, clear depth from screen wall to back wall, projector throw distance and ratio, and whether the mat can sit 10 to 12 feet from the screen without blocking a door or walkway. If any number is short, size the frame down, a slightly smaller bay that fits beats a full-size bay you can't swing in.
A golf simulator enclosure kit with impact screen bundles the frame, screen, and surrounding netting into one purchase, with bungee tensioning and fittings for the frame.
The EasySim package includes aluminum clicker tubing and a Lite impact screen in a 10'9" x 8'2" x 3'3" footprint. The Carl's Place DIY kit adds a high-contrast gray screen option for rooms with ambient light.

Plan for an afternoon of assembly with a second person, then allow time for screen tensioning and side panels.
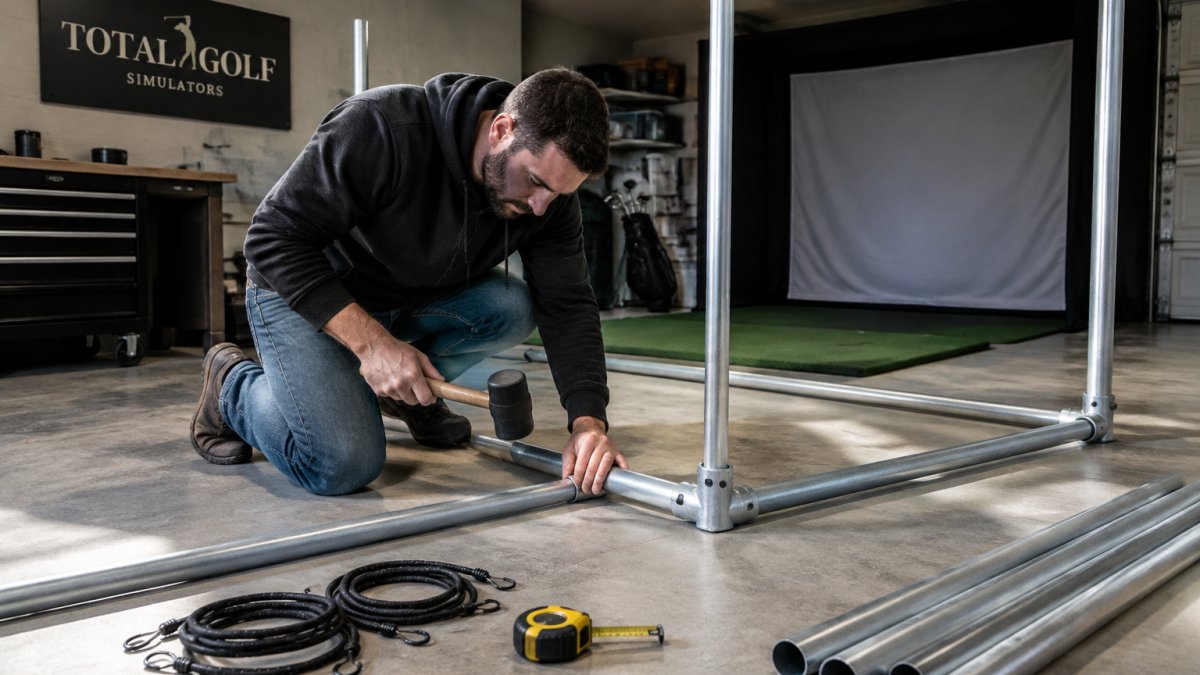
You will generally need a rubber mallet, tape measure, level, and a second set of hands. Safety glasses are worth having when assembling metal fittings.
Lay out labeled pipes by position before assembling. Seat fittings loosely before tightening, check that the frame is square, and hang the screen last for even tension.
Tightening one corner fully before the rest of the frame is seated can pull the frame out of square.
Measure against the actual room rather than the kit's nominal dimensions, since obstacles such as soffits or door tracks may require adjusting the frame.
Build time varies with experience and room conditions. Allow extra time for a first build with a helper, including cleanup.
If the frame will not square, check that the pipe diameter matches the fitting spec before forcing anything. If you are anchoring into a slab, confirm the anchor type with the slab's specifications.
A framing kit costs more than raw conduit, and you are paying for pre-cut lengths, labeled parts, and matching fittings. Sourcing locally can save on materials but takes more time and tools.
For many first-time builders, a kit can be the simpler option. A DIY Golf Enclosure System at $1,349.00 includes the screen, wrapper, and connectors, and you can add the pole kit or source EMT yourself.

Start with your room, not the kit. Measure ceiling height, width, and depth, then subtract swing clearance. Tight space: pick a compact enclosure with shallow depth. Dedicated room: buy the largest footprint your dimensions allow.
Then match three things: pipe diameter to fittings, enclosure size to kit dimensions, and screen type to your lighting. That's the whole decision. Everything else is preference.
The frame is the part of your simulator you'll never think about once it's right, and curse every session if it's wrong. Total Golf Simulators carries pre-cut framing kits, complete enclosure packages, and the fittings to tie them together, backed by our Price Match Guarantee, free shipping on most items, and a Simulator Finder Quiz that matches a setup to your space and budget. Get started with Total Golf Simulators and build a bay that stays square, tight, and safe for years of practice.
A pipe framing kit typically includes pre-cut EMT steel pipes, corner fittings, connectors, and assembly instructions. The Pipe Framing Kit from Total Golf Simulators is one option. Check the product listing to confirm what is included.
The size depends on your enclosure dimensions and room space. Measure your room's ceiling height and width, then match the kit to your enclosure's specifications. The DIY Golf Enclosure System is available in multiple sizes, so you can choose the one that fits your space.
EMT (electrical metallic tubing) is generally preferred for its rigidity and durability, and it is widely available at hardware stores. Consider your enclosure size and ball speed when choosing.
Yes, many DIYers build their own frames using locally sourced EMT conduit and fittings. However, pre-cut kits save time and ensure precise dimensions. If you choose to source materials yourself, you'll need a pipe cutter, measuring tools, and fittings. The Pipe Framing Kit is one pre-cut alternative to sourcing your own pipes.
