
Customer Svc: 855-620-2330 -
M-Sat -9am-6pm
Speak To Customer Service - 855-620-2330 - M-Sat 9:00am - 6:00pm MST
Customer Svc: 855-620-2330 -
M-Sat -9am-6pm
Speak To Customer Service - 855-620-2330 - M-Sat 9:00am - 6:00pm MST

Last Updated: November 6, 2026
Quick Summary
A modular golf simulator bay is a fixed-size module repeated across a room, sized from clear height, width, and depth measured to the lowest obstruction. Measure those dimensions first, then build the bay so it works for both right- and left-handed golfers. Adding a bay later means adding one module width.
Most golfers start with the wrong question. They ask which launch monitor to buy, when the first thing to check is whether the room fits a swing at all. A basement with a low ceiling can waste money if the dimensions are off.
Measure before you order anything. Take the height, width, and depth of the space to the lowest obstruction you cannot move, then compare those numbers against the bay you plan to build.
A modular bay is sized in three numbers: module width, module depth, and clear height. Choose one module width and repeat it. A common pattern for residential bays is a module width that gives the golfer clear space on both sides of the stance, a module depth measured from the hitting position to the screen plus backswing room behind the golfer, and a clear height measured to the lowest obstruction above the swing arc. Once those three numbers are set, every bay in the room uses the same module, and joining two bays means adding one module width plus the shared frame thickness.
Work the framework in this order:
Watch out: measuring to the finished ceiling rather than to the lowest fixture or duct is the most common sizing error, the swing arc needs clear height above the hitting area, not above the golfer's stance.
Ceiling height matters more than most people expect. A full swing with a driver needs headroom above the golfer's backswing, and a low ceiling forces compromises on the club you can comfortably use. Plan for clearance above the hitting area, not just the golfer's stance: the club path rises above the head at the top of the swing, so overhead space needs to cover the full arc.
Width and depth decide whether the bay feels usable or cramped. Leave room on both sides of the golfer, since a right-handed and a left-handed player need different amounts of space on their swing side. Build the layout so the bay works for both, especially if the room will be shared. Depth gives the golfer room behind the ball and keeps the screen far enough away for a realistic image.
Because the module is fixed, reconfiguration is arithmetic. Adding a bay means adding one module width plus the shared frame thickness and confirming the room still has walkway space. When the wall run leaves an awkward remainder, compare modular wall kits by how their dimensions and shared frame components fit the planned bay layout before committing to a configuration.
Modular bays work best when you plan for the next bay before you build the first one. The panel system lets you set a consistent module size, then repeat it across the room or add a second bay later.
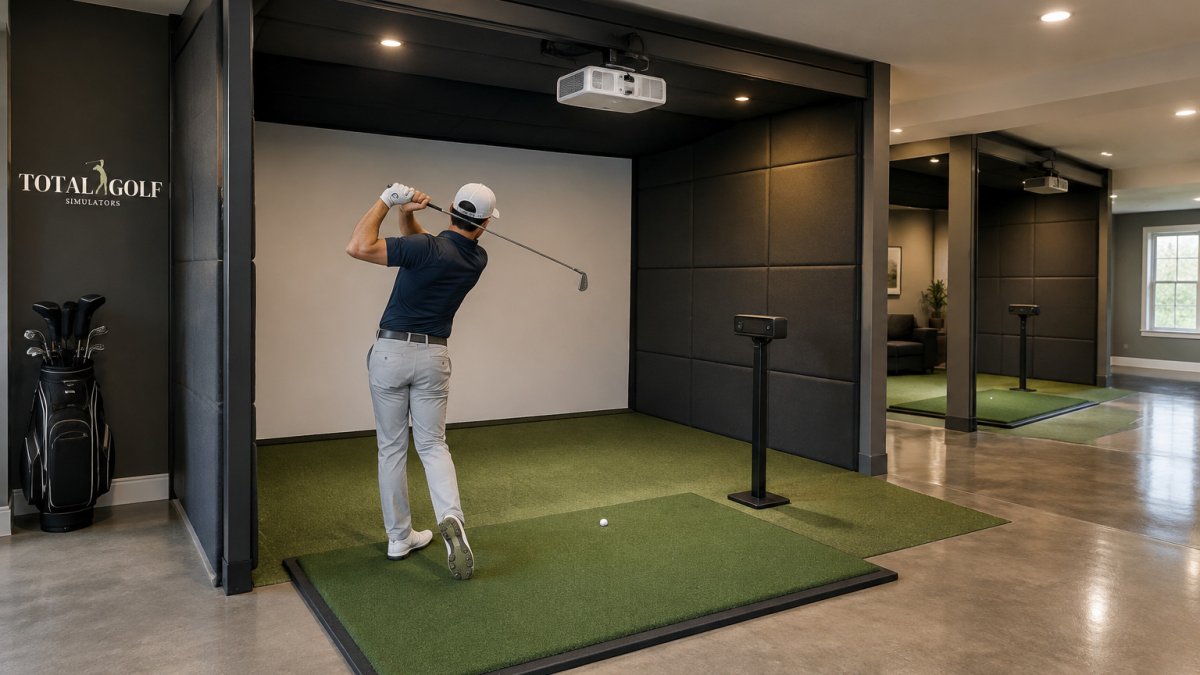
Golfer swinging in a modular simulator bay with a ceiling projector and launch monitor in a finished basement
Think of the layout as a grid. Choose one module size, mark the footprint on the floor, and keep every bay aligned to it.
Place the bay where the golfer has a clear view of the screen and room to swing without hitting walls. Keep spacing between bays so players are not in each other's swing path. Position the launch monitor and the projector where they stay out of the swing arc but still read the ball accurately.
Lighting affects both the projected image and the golfer's comfort. Direct light on the screen washes out the picture, so position fixtures to avoid glare on the impact surface. Dimmable, indirect lighting usually gives the cleanest result.
Flooring should absorb impact and give a stable stance. Many players use a hitting mat over a firm base, which protects the floor and keeps the golfer steady. Choose a mat that matches the club types you'll use most.
The enclosure and projector work together, so choose them as a system. The enclosure controls where the ball goes and how much protection the room gets, while the projector controls the image. Mismatched parts cause frustration, which is why we recommend planning them together.
The modular golf simulator bay enclosure with a premium panel wall system is available, and a version with side walls is also offered.


Padded panels on the enclosure are designed to help reduce bounce-back and noise.
Mounting the projector is often the hardest part of the build. A ceiling mount works in some rooms, but it isn't always practical. The SkyRail+ attached projector mount offers a 29-inch slide range.

All Sports Systems - SkyRail+ Enclosure Attached Projector Mount - 29" Slide Range - Black or White
Once the projector is set, place the launch monitor where it reads the ball cleanly. A buyer's guide to launch monitors can help you match the monitor to your setup and budget before you place it.
The enclosure and projector work as a system, and the attached mount option is one of the main ways to position the projector without ceiling work.
Component |
Key detail |
Note |
|---|---|---|
Padded panels |
Reduce bounce-back and noise |
Built into the enclosure |
SkyRail+ mount |
29-inch slide range |
Attached projector mount |
Ceiling mount |
Works in some rooms |
Not always practical |
Attached mount |
No ceiling drilling |
No overhead cable runs |
A complete kit brings the enclosure, screen, projector mount, and launch monitor together in one plan. Start with the bay dimensions you measured, then build the kit around them. Confirm each part fits the others before you order.
Check the list against your plan:
Most room guides stop at "budget for it." A premium modular bay needs a phase plan, a bill-of-materials logic, and an infrastructure checklist you can hand to an electrician and a finish carpenter. Build the plan in that order so the enclosure, screen, projector, and launch monitor are all sized against the same footprint.
Phase 1 sets the footprint: enclosure frame, impact screen, side and wall protection, and the hitting mat. Nothing else can be finalized until those dimensions are locked. Phase 2 adds the image and data layer: projector, mount, launch monitor, and the cabling that ties them together. Phase 3 finishes the room: lighting, flooring beyond the mat, acoustic treatment, ventilation, and trim.
Watch out: quoting a single "all-in" number before the bay count and ceiling height are confirmed is the most common way budgets blow past plan, the enclosure and screen scale with bay count, but the projector throw distance and mount height scale with the room.
Run infrastructure before walls close. A practical checklist for a multi-bay room:
A finished room amplifies ball impact and projector fan noise. Acoustic panels on the walls behind and beside the hitting area reduce bounce and flutter echo; a common pattern is to treat the rear wall and the first side-reflection points rather than covering every surface. Ventilation matters because enclosures trap warm air, plan supply and return so air moves across the bay rather than through the swing path. In basements, a dehumidifier sized to the room prevents turf and mat degradation.
Rather than quoting a single price, plan three tiers and let the reader choose: a core tier (frame, screen, mat, basic lighting), a premium tier (padded side and wall protection, dimmable indirect lighting, acoustic treatment, hardwired network), and a flagship tier (custom finishes, integrated control, ventilation and climate control, concealed cabling). Pricing varies by bay count, ceiling height, and regional labor, so confirm current figures with your installer before committing, but the tier structure keeps the conversation anchored to scope rather than a single number.
A modular bay is a project worth planning carefully. Measure the room, choose a module size you can repeat, and pick an enclosure and projector setup that work as one system. The right plan turns an unused room into a golf space you'll use all year.
If you want help matching the layout to your room, talk to our team about a custom bay plan.
Most home bays need a ceiling height of about 10 feet to allow a full swing with a driver, and enough width and depth to keep the golfer and the swing clear of walls. Measure your room first, then account for the enclosure frame, the projector throw distance and at least a few feet of clearance behind the golfer. Plan for both right- and left-handed use if the room will be shared. Modular bays can be sized to fit a specific footprint, so confirm your dimensions before ordering.
A modular golf simulator bay is built from panels and frame components that assemble into a defined enclosure. Padded panel walls help reduce bounce-back and noise and create a cleaner look than traditional net enclosures. Because the components repeat, you can add bays or reconfigure the layout later. Total Golf Simulators' Modular Golf Simulator Bay Enclosure with Premium Panel Wall System is designed for home simulators, garages and commercial golf facilities, and custom sizes are available on request.
Yes. Modular bays are well suited to garages, basements and spare rooms because they are assembled inside the space rather than built into the structure. Confirm ceiling height, door width and floor condition before ordering. If you want the bay to mount projectors without ceiling work, a frame-attached projector mount such as the SkyRail+ can position the projector directly from the enclosure.
Costs depend on the enclosure, projector, launch monitor, flooring and whether you add professional assembly. The Modular Golf Simulator Bay Enclosure with Premium Panel Wall System is priced at $6,850.00, the version with side walls is $7,150.00, and professional assembly is available for $3,000. The DIY Golf Enclosure System starts at $1,349.00 with several size options. Budget separately for electrical work, lighting and flooring.
