Start With Space: Dimensions That Decide Everything
A multi purpose home golf simulator setup lives or dies on the room. Before comparing launch monitors or impact screens, measure three things: ceiling height, swing radius, and the buffer zone behind your hitting area.
Modular Golf Simulator Bay Enclosure with Premium Panel Wall System
Ceiling Height, Swing Radius, and the Buffer Zone
Measure these three dimensions before anything else:
Ceiling height: Stand where you'll hit and swing your longest club. If the club grazes anything, no simulator fixes that.
Swing radius: Allow clearance behind and beside your stance for the club path, not just your body.
Buffer zone: Leave enough depth between ball and screen for the launch monitor to capture ball flight data cleanly.
A common mistake is buying an enclosure first and discovering the room is too shallow for the buffer zone. Measure, then shop.
How to Build a Multi Purpose Golf Simulator Setup Around Your Room
The best multi purpose home golf simulator setup treats the simulator as a component of the room, not the whole room, choose an enclosure that disappears or blends when you're not playing, positioned so the rest of the space still works for seating, storage, or a home office.
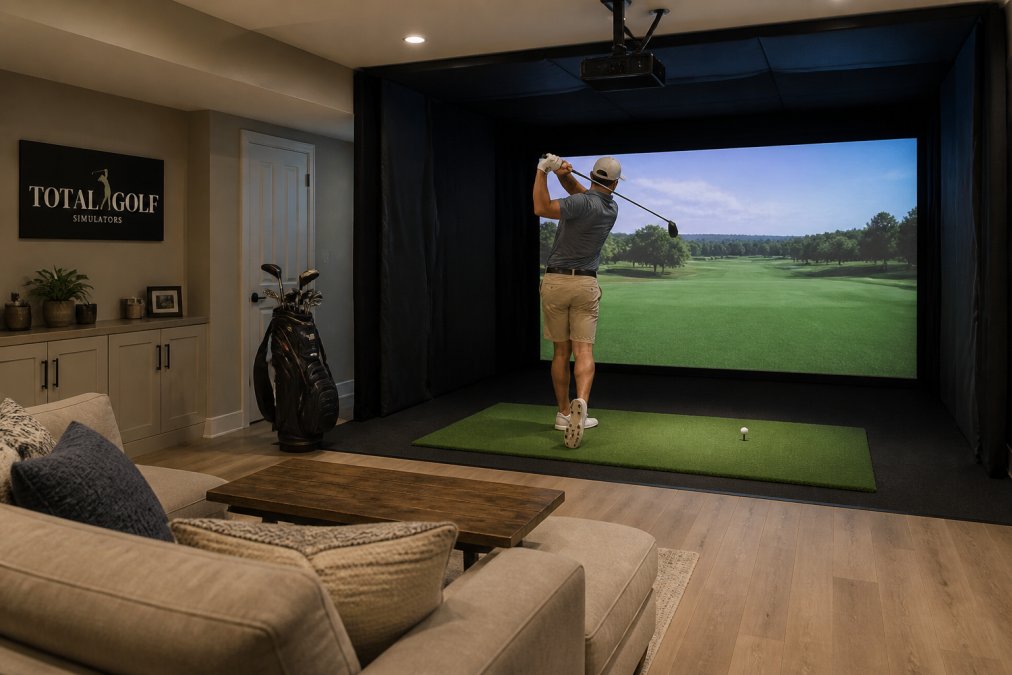
Golfer mid-swing in a multi purpose home golf simulator setup in a finished basement with lounge seating
Choosing an Enclosure That Fits a Shared Space
Enclosure choice drives how "multi purpose" your room feels. A full-frame permanent bay dominates a space; a modular or retractable approach keeps the room usable.
Retractable Golf Simulator Screen Options for Shared Rooms
A retractable golf simulator screen is the fastest way to reclaim a room when you're not playing: instead of a permanent impact screen bolted to a frame, it rolls or folds away so the space returns to normal.
Setup Type
Best For
Trade-Off
Retractable screen
Shared living spaces
More moving parts to maintain
Fixed impact screen
Dedicated rooms
Room stays committed to golf
Modular panel bay
Finished interiors
Higher upfront cost
Space Saving Golf Simulator Ideas That Actually Work
Space saving golf simulator ideas work best when they solve the room's real constraint, not just the simulator's footprint. A multi-purpose setup isn't about shrinking the simulator, it's about making it disappear when you're not using it, which means solving for footprint, sightline, and sound at once.
Carl’s Place Pro Golf Simulator Enclosure (2025 Model) – Premium Customizable Impact Screen & BlackStop™ Enclosure
Footprint: Reduce the Depth the Simulator Demands
Ultra-short-throw projection. A UST projector at roughly 0.25:1 throw ratio sits inches from the screen instead of 12-15 feet back, reclaiming the entire rear of the room for seating or a desk.
Camera-based launch monitor. Units like SkyTrak or Uneekor need 8-10 feet of total depth versus 14-18 feet for radar, which is often the difference between a usable room and a non-starter.
Corner placement. A corner bay uses two walls you're already paying for and leaves the center of the room open for furniture.
Ceiling-mounted hardware. Mounting the projector and launch monitor overhead keeps the floor clear so the room reads as a normal living space when the screen is down.
Sightline: Make the Equipment Vanish
Retractable screens roll up into a housing that looks like a projector screen or a valance. When retracted, the wall reads as a plain wall.
Retractable netting for warm-up sessions lets you hit without dropping the full projection screen.
Modular panel bays with padded wall panels look like finished acoustic paneling rather than a golf cage, so the room still works as a den or office.
Furniture that doubles as storage. A low console under the screen can hide the PC, cables, and launch monitor when not in use.
Sound: The Shared-Room Problem Nobody Solves
Ball impact on an impact screen produces a sharp, percussive crack, often 90+ decibels at the strike point. In a shared living space, that's the complaint you'll hear first.
What actually reduces impact noise:
Padded enclosure panels absorb high-frequency impact sound better than bare netting. High-density foam-backed panels are the standard solution.
Mass on the shared wall. Adding a second layer of drywall or mass-loaded vinyl to the wall between the simulator and a bedroom cuts transmission significantly.
Carpet and acoustic ceiling tiles reduce the reverberation that makes the room sound loud even after the ball stops.
A heavy curtain or moving blanket hung behind the impact screen absorbs the low-frequency thump that panels miss.
Electrical and Connectivity: Plan Before You Install
A dedicated 15- or 20-amp circuit for the PC, projector, and launch monitor so a space heater or vacuum doesn't trip the breaker mid-round.
Short, labeled HDMI and USB runs. Long unshielded HDMI cables are a common cause of signal dropouts; keep the PC near the projector or use an active optical cable.
Stable internet if you're running cloud-based simulation or online play. A wired Ethernet drop to the PC beats Wi-Fi for latency.
Cable management through ceiling raceway or wall conduit so the room doesn't look like a server closet when the screen is up.
Pro TipMount your projector and launch monitor on the same ceiling track or beam. It keeps cabling short, protects both units from stray shots, and makes sensor alignment far easier to reset.
The goal is a setup you don't have to dismantle every time someone wants the room back, and one that doesn't announce itself as a golf bay when it's idle.
Garage Golf Simulator Conversion: A Step-by-Step Plan
A garage golf simulator conversion is the most popular path because garages offer the height, depth, and separate entrance most homes lack. The catch: garages are unfinished, unheated, and often full of everything you own.
Plan the conversion in this order:
Clear and measure. Empty the bay and confirm ceiling height, depth, and width.
Plan electrical. You'll need outlets for the projector, launch monitor, PC, and lighting. Add them before you install anything.
Insulate and finish. Temperature swings affect both your comfort and your electronics.
Install the enclosure. Frame and screen first, then tension everything.
Mount the projector. Set throw distance to match your screen size and aspect ratio.
Position the hitting mat. Center it on the screen and confirm your buffer zone.
Calibrate the launch monitor. Align the sensor to your ball position and test.
Watch OutSkipping the insulation step is the most expensive mistake in a garage build. Condensation and temperature swings can shorten the life of projectors, PCs, and launch monitor sensors, and you'll only notice after the warranty window closes.
Launch Monitor, Projector, and Software: Matching Components
Your components only work as a system. Match them in this order: launch monitor first (it dictates minimum room depth), projector second (it dictates throw distance and screen size), software last (it must support both).
Radar units (Flightscope XC3 and Trackman-style systems) track the ball through the air and generally need 8-10 feet of ball flight plus 6-8 feet behind the ball for the unit itself. Camera-based units (ProTee VX, Uneekor Eye Mini, Foresight GC3) photograph the ball at impact and can work in as little as 8-10 feet of total depth, which is why they dominate garage and basement builds.
Key specs to compare:
Ball flight measurement: Radar reads full trajectory; camera reads the first few feet and calculates the rest.
Club data: Not all units measure club path, face angle, and attack angle. If you want to practice shot shaping, confirm club data is included, not an add-on.
Minimum depth: This is the number that eliminates units from your shortlist before anything else.
Indoor vs. outdoor: Some radar units struggle with limited flight indoors; check the manufacturer's indoor minimums.
Projector: Throw Ratio Is the Spec That Matters
Throw ratio is the distance from the lens to the screen divided by the screen width. A 1.5:1 projector throwing a 10-foot-wide image needs 15 feet of distance; an ultra-short-throw (UST) projector at 0.25:1 needs only about 2.5 feet, which is why UST units are standard for shallow rooms.
Do the math before you buy:
Measure the distance from your planned projector mount to the screen.
Divide by your target screen width.
That result is your required throw ratio. Buy a projector at or below it.
Software and PC: The Frame Rate Floor
Check three things before you commit to software:
Launch monitor compatibility: Not every software supports every monitor. Confirm the pairing on the software's compatibility list.
Subscription vs. perpetual license: Some platforms charge annually; others sell a one-time license. Factor the recurring cost into your budget.
Course library and online play: If you want multiplayer or league play, confirm the platform supports it.
Pro TipBuild your PC to the software's recommended spec, not the minimum. The price difference is usually a few hundred dollars, and it's the difference between a smooth image and a stuttering one you'll want to replace within a year.
The Carl's Place Pro Golf Simulator Enclosure (2025 Model) addresses one part of this puzzle directly: its moveable crossbar lets you adjust launch monitor alignment for either radar or camera-based tracking without rebuilding the frame. That flexibility matters when you upgrade tracking technology later.
Noise, Electrical, and Long-Term Maintenance Planning
Acoustic treatment and electrical planning are what separate a setup you love from one you regret.
Maintenance is simple but non-negotiable:
Inspect the impact screen for wear at high-strike points.
Re-tension bungees and hook-and-loop flaps as they loosen.
Clean projector filters on schedule.
Re-check sensor alignment after any hardware move.
Key TakeawayA multi purpose home golf simulator setup succeeds on planning, not budget. Measure the room, sequence the electrical work, and choose components that share specs. The equipment is the easy part.
Frequently Asked Questions
How much space do I need for a multi purpose golf simulator?
Plan for at least 10 feet of ceiling height, 12 feet of width, and 16 feet of depth from the tee to the screen. Taller golfers or faster swing speeds may need 10.5 to 11 feet of ceiling. Leave a buffer zone of 2 to 3 feet behind the tee for your backswing and follow-through. If your room is smaller, a retractable screen and a compact hitting mat let you reclaim the floor when the simulator is not in use.
Can a golf simulator room double as a home theater?
Yes, and this is one of the most common multi purpose setups. Use a retractable impact screen that rolls up into a housing, pair it with a projector that handles both simulation software and streaming video, and choose a hitting mat you can move or store. Keep HDMI cabling and your PC or console in one rack so switching between golf and movie night takes a minute or two, not a full teardown.
What are the best retractable screens for multi purpose golf setups?
Look for a screen with a motorized or manual roll-up housing that mounts to the ceiling, plus enough weight in the bottom hem to hang flat without wrinkles. A high-contrast gray surface holds up better in rooms with ambient light, which matters when the space is not a dedicated cave. Confirm the screen width covers your enclosure opening and that the housing clears your ceiling height when rolled up.
How do I protect walls and ceiling in a shared simulator room?
Line the bay with an enclosure that includes side and ceiling panels, and add foam inserts or padded panels behind the screen to absorb high-velocity mis-hits. A panel-wall enclosure reduces bounce-back and noise compared to bare netting. For rooms with furniture or windows nearby, keep the hitting area centered and extend side netting at least 3 feet past the screen edges so shot dispersion stays contained.