
Customer Svc: 855-620-2330 -
M-Sat -9am-6pm
Speak To Customer Service - 855-620-2330 - M-Sat 9:00am - 6:00pm MST
Customer Svc: 855-620-2330 -
M-Sat -9am-6pm
Speak To Customer Service - 855-620-2330 - M-Sat 9:00am - 6:00pm MST

Last Updated: September 23, 2026
Installing a commercial golf simulator isn't a plug-and-play operation. It requires careful planning around space, electrical infrastructure, and technical alignment. The difference between a successful installation and a frustrating one comes down to preparation.

A commercial golf simulator installation involves coordinating multiple systems: launch monitors that track ball flight data, impact screens that absorb shots at high velocity, enclosures that contain the play area, projectors that display virtual courses, and software that ties everything together. Each component depends on the others working in sync.
The most common mistake facility owners make is treating this like a home setup scaled up. Commercial environments face unique demands: higher daily usage, multiple users with different swing speeds, equipment durability requirements, and the need for reliable performance during peak hours. These factors shape every decision you'll make about your installation.
Your ceiling height is the first hard constraint. Most commercial golf simulator setups require a minimum of 10 feet of clearance from the floor to the lowest obstruction. This accounts for the swing arc of a tall golfer and the trajectory of the ball before it reaches the impact screen.

If your space has a 10-foot ceiling, you can make a commercial golf simulator work, but you'll need to position your launch monitor and impact screen strategically. The impact screen should sit approximately 6-7 feet from the hitting position, which leaves room for the ball to travel and be detected by the launch monitor before impact. Some facilities with lower ceilings use specialized camera-based systems that detect the ball closer to impact, reducing the required throw distance.
Anything below 9 feet becomes problematic. You lose the margin for error, and golfers will feel constrained during their swing. Overhead pipes, ductwork, or HVAC vents need clearance too. Map out your entire ceiling before ordering equipment.
A standard commercial golf simulator bay requires a minimum of 80 square feet (roughly 8 feet wide by 10 feet deep). This gives you enough room for a hitting mat, launch monitor positioning, and proper sight lines to the impact screen.
Larger facilities often allocate 120-150 square feet per bay to allow for comfortable movement, spectator space, and maintenance access. If you're planning multiple bays in a single facility, factor in walkways and separation between stations to prevent interference with adjacent launch monitors.
The hitting mat itself typically measures 4 feet by 8 feet. Position it far enough from the impact screen to allow ball flight detection. Most launch monitors work best with 6-8 feet of distance between the mat and screen for optimal ball flight data accuracy.
Before you order a single piece of equipment, map out your electrical needs. A commercial golf simulator setup typically requires 20-30 amps of dedicated power, depending on your projector brightness and additional components like lighting or climate control systems.
The projector alone can draw significant power, especially high-lumen models designed for bright commercial spaces. Launch monitors and computers add to the load. Run dedicated circuits rather than tapping into existing outlets. If you're installing multiple bays, each should have its own circuit to prevent power fluctuations that can affect launch monitor accuracy.
HVAC considerations matter more in commercial settings than home installations. High-speed cameras and projectors generate heat. Enclosures can trap that heat if ventilation is inadequate. Plan for air circulation that keeps equipment temperature stable without creating air currents that affect ball flight detection. Consult with your HVAC contractor about placement of vents and returns relative to your simulator bay.
Consider climate control zones. If your facility has varying temperature areas, the launch monitor calibration may drift as it moves between zones. Consistent temperature within your simulator space improves data reliability.
Electrical and HVAC planning should happen before installation begins. Retrofitting these systems after equipment is in place costs significantly more and may require downtime during your peak season.
Your launch monitor is the brain of your commercial golf simulator installation. It captures ball flight data through either radar-based or camera-based technology. Radar systems (like TrackMan or FlightScope) detect the ball in flight. Camera-based systems use high-speed imaging to track ball characteristics.
For commercial use, consider durability and accuracy across varying swing speeds. Your facility will see everyone from beginners hitting 60 mph to advanced golfers hitting 120+ mph. A strong launch monitor maintains accuracy across that range.
The Carl's Place Premium Impact Screen is engineered for commercial environments. It handles direct impact from balls traveling up to 250 mph without degradation. The multilayer fabric design reduces sound, minimizes bounceback (which can confuse launch monitors), and blocks ambient light so projector images remain crisp. This matters in commercial settings where you might have windows or ambient lighting that a home setup wouldn't deal with.
Carl's Place Premium Impact Screen →
Position your launch monitor carefully. If using a radar system, place it to the side of the hitting area at approximately 45 degrees from the ball's initial direction. Camera-based systems need clear sight lines to the ball. Test positioning before finalizing your installation. Small adjustments in launch monitor placement can significantly affect data accuracy.
The impact screen should be perpendicular to the hitting line and positioned to capture the full range of shot directions. Most golfers don't hit perfectly straight, so your screen needs width to handle hooks, slices, and pushes without the ball missing the target area.
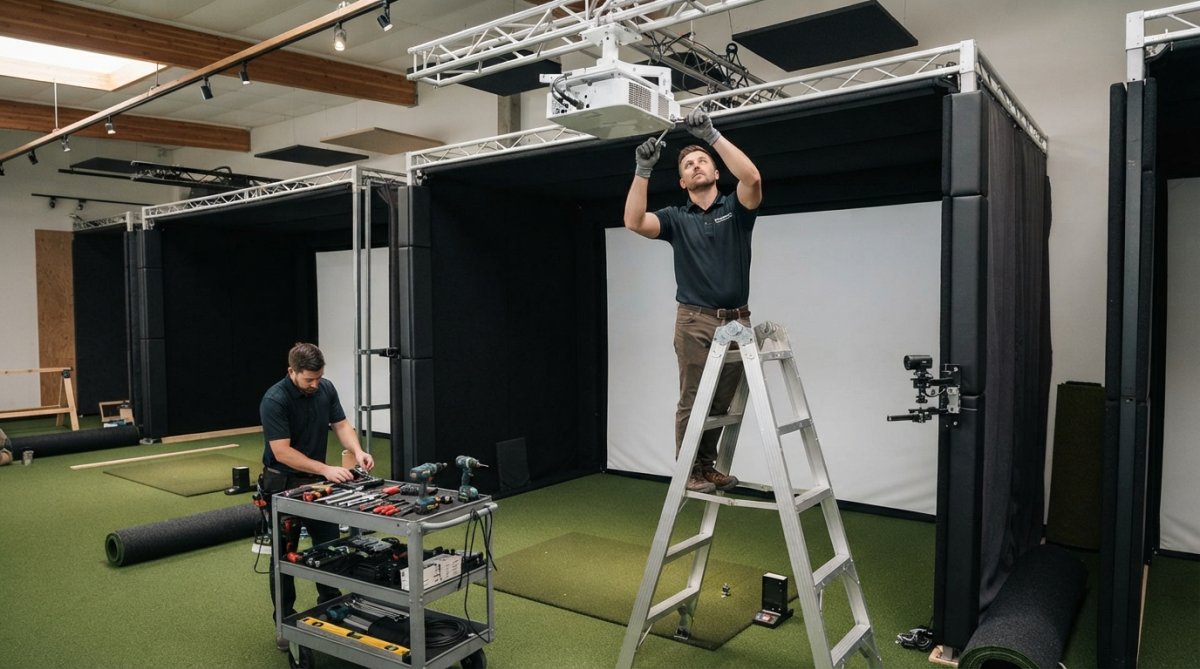
Your enclosure serves multiple purposes: it contains the play area, reduces noise for adjacent spaces, improves projector image quality by blocking ambient light, and provides safety containment. For commercial facilities, the Carl's Place Pro Golf Simulator Enclosure offers professional-grade durability with customizable sizing. The 2025 model includes a moveable crossbar system that lets you adjust launch monitor alignment during setup without reinstalling components.
The modular panel wall system provides a premium aesthetic appropriate for commercial spaces. Unlike traditional net enclosures, padded panels reduce bounceback and noise while creating a finished look that blends into modern facility design. If you're upgrading a golf instruction studio or hospitality venue, the panel design elevates the entire space.

Install your projector on a secure ceiling mount positioned to deliver proper throw distance to your impact screen. Throw distance determines image size. A typical setup uses a projector mounted 8-10 feet from the impact screen, creating an image that fills the screen without distortion.
High-speed cameras integrated into your enclosure track additional ball flight characteristics that radar or primary camera systems might miss. These feed into your swing analysis software, giving golfers detailed feedback on clubhead speed, swing path, and ball characteristics.
Electrical connections need organization. Run power and data cables through conduit to prevent tripping hazards and protect cables from foot traffic. In high-traffic commercial environments, cable management becomes a safety and maintenance issue.
Calibration determines whether your commercial golf simulator installation delivers accurate feedback or misleads your users. A miscalibrated system frustrates golfers and damages your facility's reputation.
Most launch monitors ship with calibration procedures. Follow them exactly. Use calibration balls that match the specifications your system expects. Different ball compression and cover materials affect how the launch monitor reads ball characteristics.
Test your system across multiple swing speeds before opening to users. Have a range of golfers (slow swing speed, moderate, and fast) hit balls while you verify that the data matches reality.
The cost of a commercial golf simulator installation ranges widely based on your choices. A basic setup with a mid-range launch monitor, impact screen, and simple enclosure might run $8,000-$15,000. A fully featured installation with premium components, professional enclosure, and integrated software can exceed $25,000.
Commercial simulators require more frequent maintenance than home setups due to higher usage volume. Establish a weekly routine: check impact screen for wear, inspect enclosure panels for damage, clean projector lens, and verify launch monitor calibration with test shots.
Ball flight data inconsistency often stems from launch monitor calibration drift. Temperature changes, equipment settling, or impacts near the launch monitor can cause drift. Recalibrate monthly and after any major impact or equipment adjustment.
A 9-foot ceiling is tight for commercial use but workable with proper planning. Most commercial setups require 10-11 feet minimum to accommodate the projector throw distance, swing clearance, and infrared sensor positioning. With a 9-foot ceiling, you'll need to angle the projector more steeply and position the launch monitor closer to the hitting area. Confirm your specific launch monitor and projector specifications before installation to ensure ball flight data accuracy and safe swing mechanics.
A complete commercial-grade installation ranges from $8,000 to $25,000+, depending on enclosure type, launch monitor caliber, and custom integration needs. A Carl's Place Pro Enclosure runs $3,409.95, while the Modular Bay Enclosure with panel walls starts at $6,850. Add launch monitor costs ($2,000-$15,000), projector ($1,500-$4,000), and professional installation services ($2,000-$5,000). Facility-specific electrical work, HVAC modifications, and permitting add further. Budget for ongoing maintenance and software subscriptions.
Weekly: inspect impact screen for wear, clean projector lens, check enclosure fasteners. Monthly: calibrate launch monitor and high-speed camera, test cloud-based analytics for data accuracy, inspect floor padding and safety netting. Quarterly: deep clean all components, verify electrical connections, assess turf quality and replace if damaged. Annual: professional recalibration of photogrammetry systems, HVAC filter replacement, full safety inspection. High-traffic facilities (20+ hours weekly) need more frequent calibration to maintain swing analysis accuracy.
A standard installation takes 2-4 days for a single bay, depending on site preparation and complexity. Basic setup with pre-assembled enclosure: 1-2 days. Custom integration with multiple bays, electrical upgrades, and HVAC modifications: 5-7 days. Professional assembly options (like the $3,000 add-on for modular enclosures) accelerate the process and ensure proper launch monitor alignment, infrared sensor calibration, and projector throw distance optimization. Plan for additional time if permitting or structural modifications are required.